Register Models
Before deploying a machine learning model through the AI Hub, you need to register the prepared machine learning model in the AI Hub through the New Model function.
In the process of registering a model, only the basic information and data input and output of the model are defined, and the model file will not be imported. For the steps for importing model files, see Stage a Model Version.
Prerequisites
Before using the AI Hub, you should ensure that your organization has request the AI - Container resource through the EnOS Management Console > Resource Management > AI Studio page.
Register a Model
You can register a custom model by following these steps:
Log in to the EnOS Management Console, and select Data Analytics > AI Studio > AI Hub from the left navigation bar to open the AI Hub homepage.
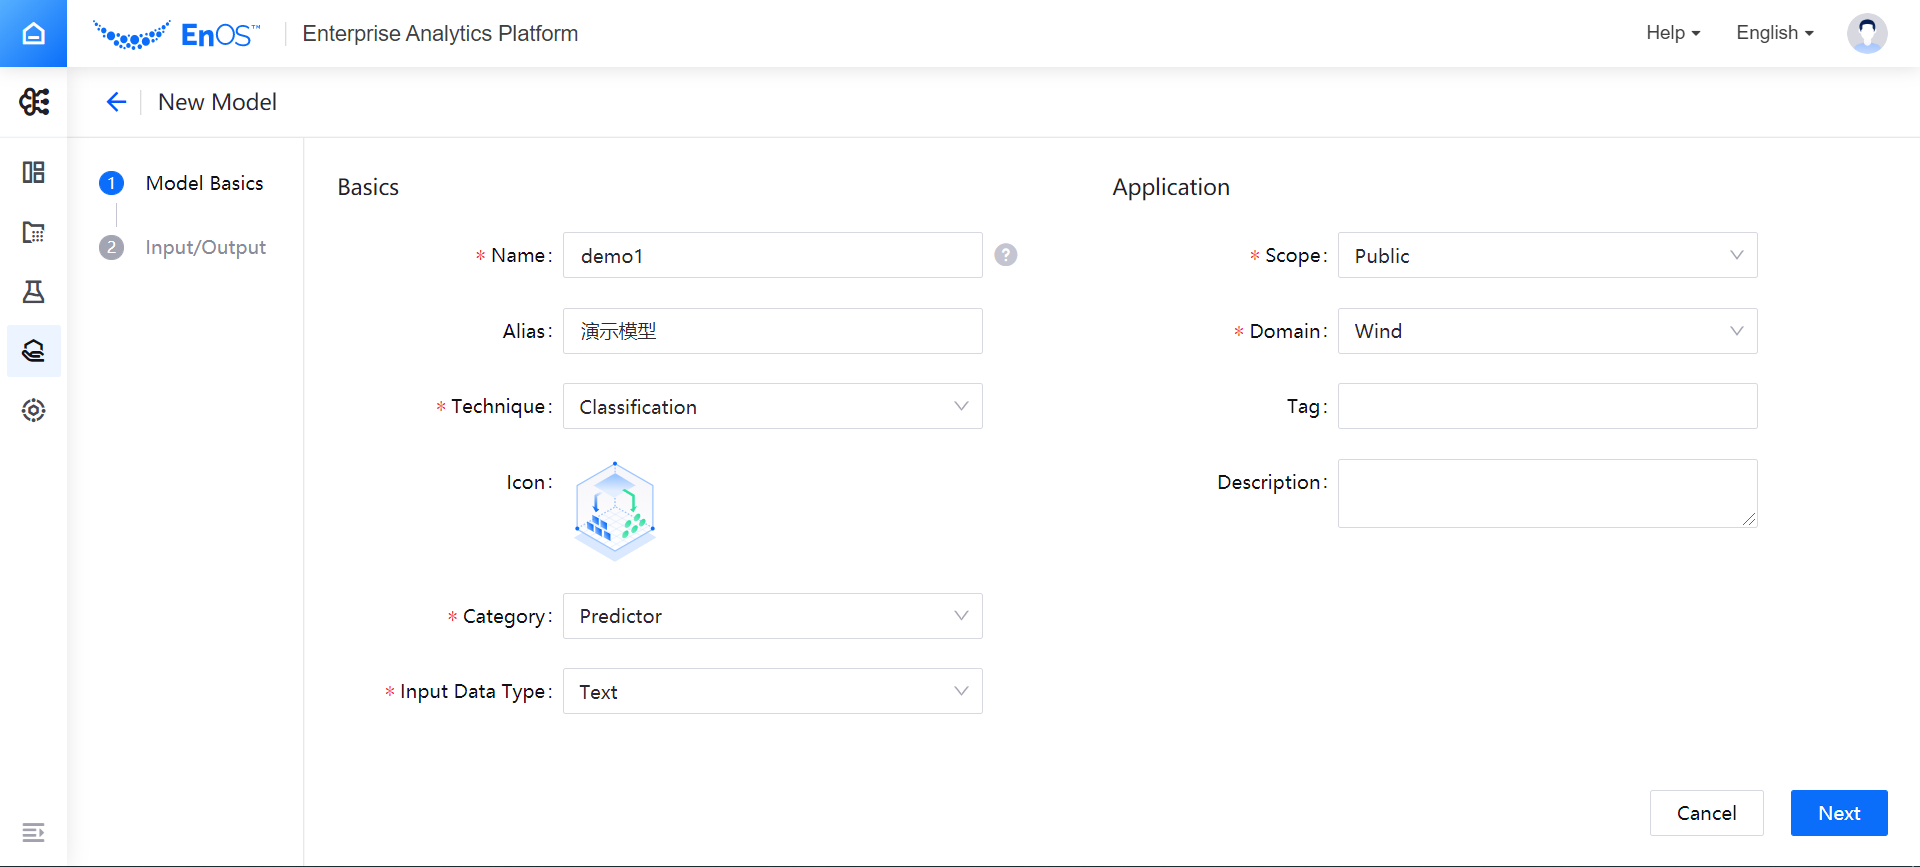
Select Custom Model in the left Filter By menu. Then, select New Model to configure the basic information and application information of the model:
Name: enter the name of model
Alias: enter the alias of the model
Technique: select the algorithm technology attribution of the model, such as classification, fitting, clustering, or other algorithms
Category: select the functional category of the model (prediction, optimization or data conversion)
Input Data Type: select the type of model feature input data (Text, Tabular or Image)
Scope: select the model as a private model or a public model, where the public model can be shared within the organization
Domain: select the business domain where the model can be applied
Tag: enter the label of the model, where you can define up to 7 labels for each model
Description: enter short description of the model
Select Next to complete the data input and output configuration of the model. For different input data type (Text or Image), the model configuration is different.
For Text Input Data Type
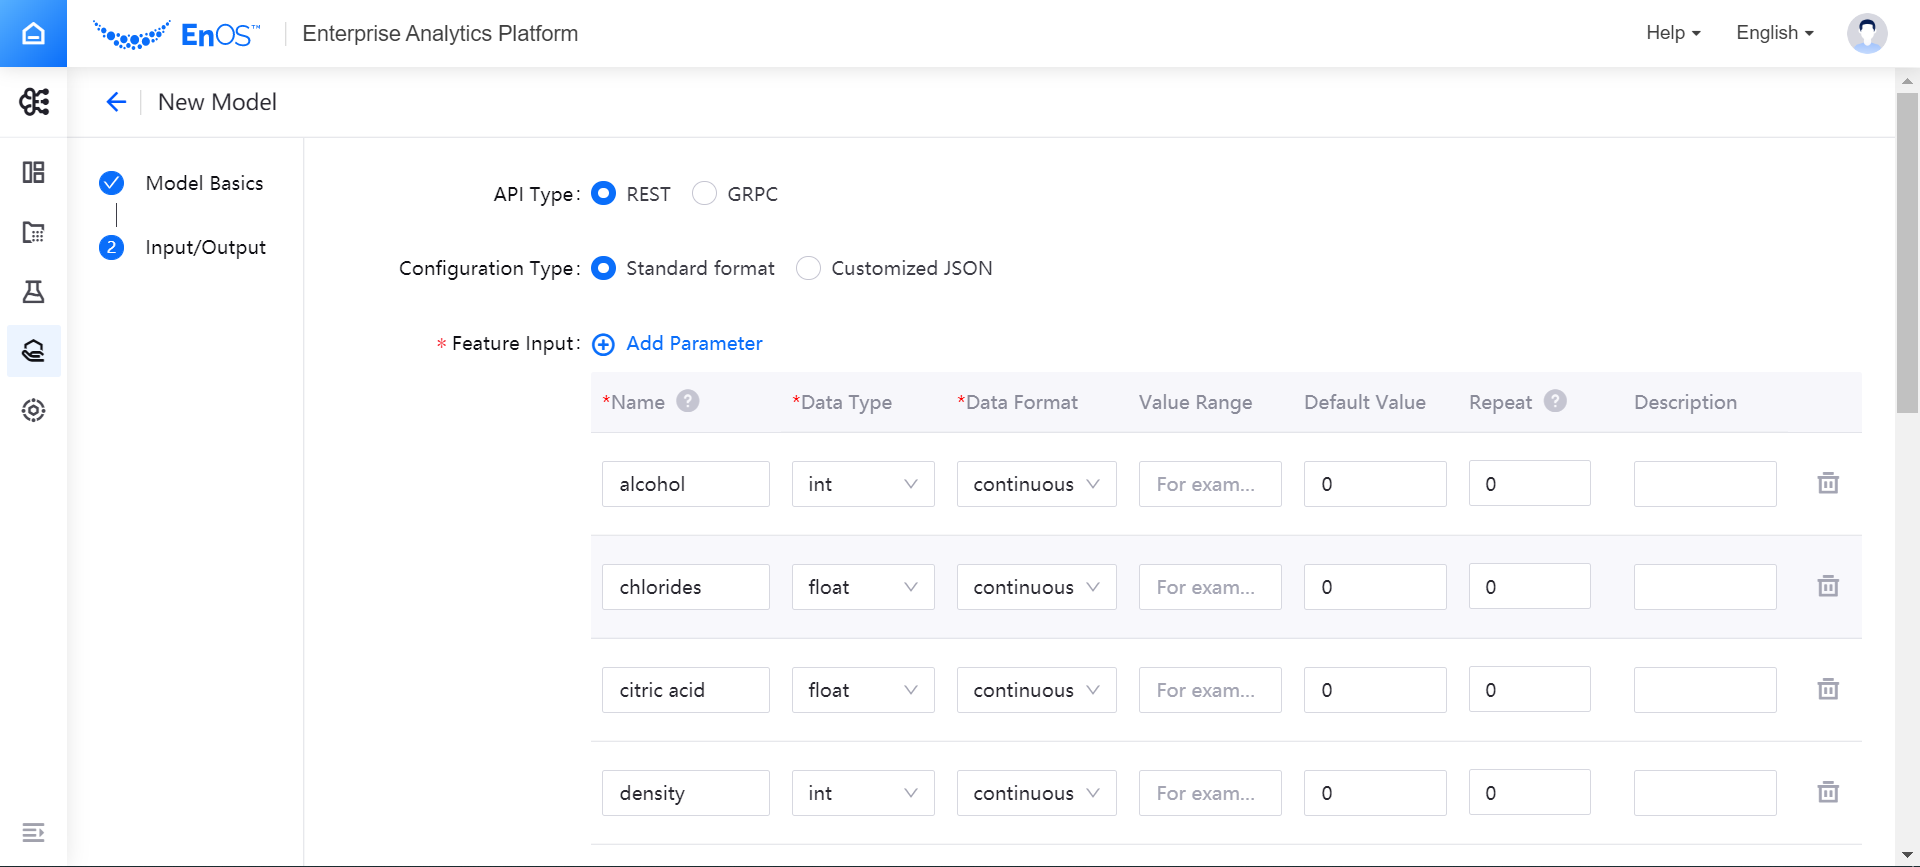
For text input data type (Text or Tabular), complete the following data input and output configuration of the model:
API Type: Select the API type to call the model service:
REST: The service can be invoked through a browser, and the HTTP API requests are sent in text form, which can be read and created by humans without the need to install a client.
GRPC: It adopts a magnitude message format, is suitable for low-latency & high-throughput communication microservices and multi-language mixed development environment, and provides good support for two-way streaming media.
Configuration Type: Select the feature input and output method (standard data format or customized JSON input)
If you choose Standard format, you need to add and define data input and output parameters one by one in Feature Input and Target Output, as shown in the following figure:
If you choose to Customized JSON, you can enter the defined JSON input and output parameters into the input box to complete the data input and output configuration.
(Optional) Select Batch Import to download the feature table file template, and then import the feature table file after editing it so as to complete the data input and output configuration. When using custom JSON input parameters, the feature input parameters
name,dtypeandftypeare required, and other parameters are optional. The feature input parameters must match the target output parameters. Otherwise, the table file parsing might fail.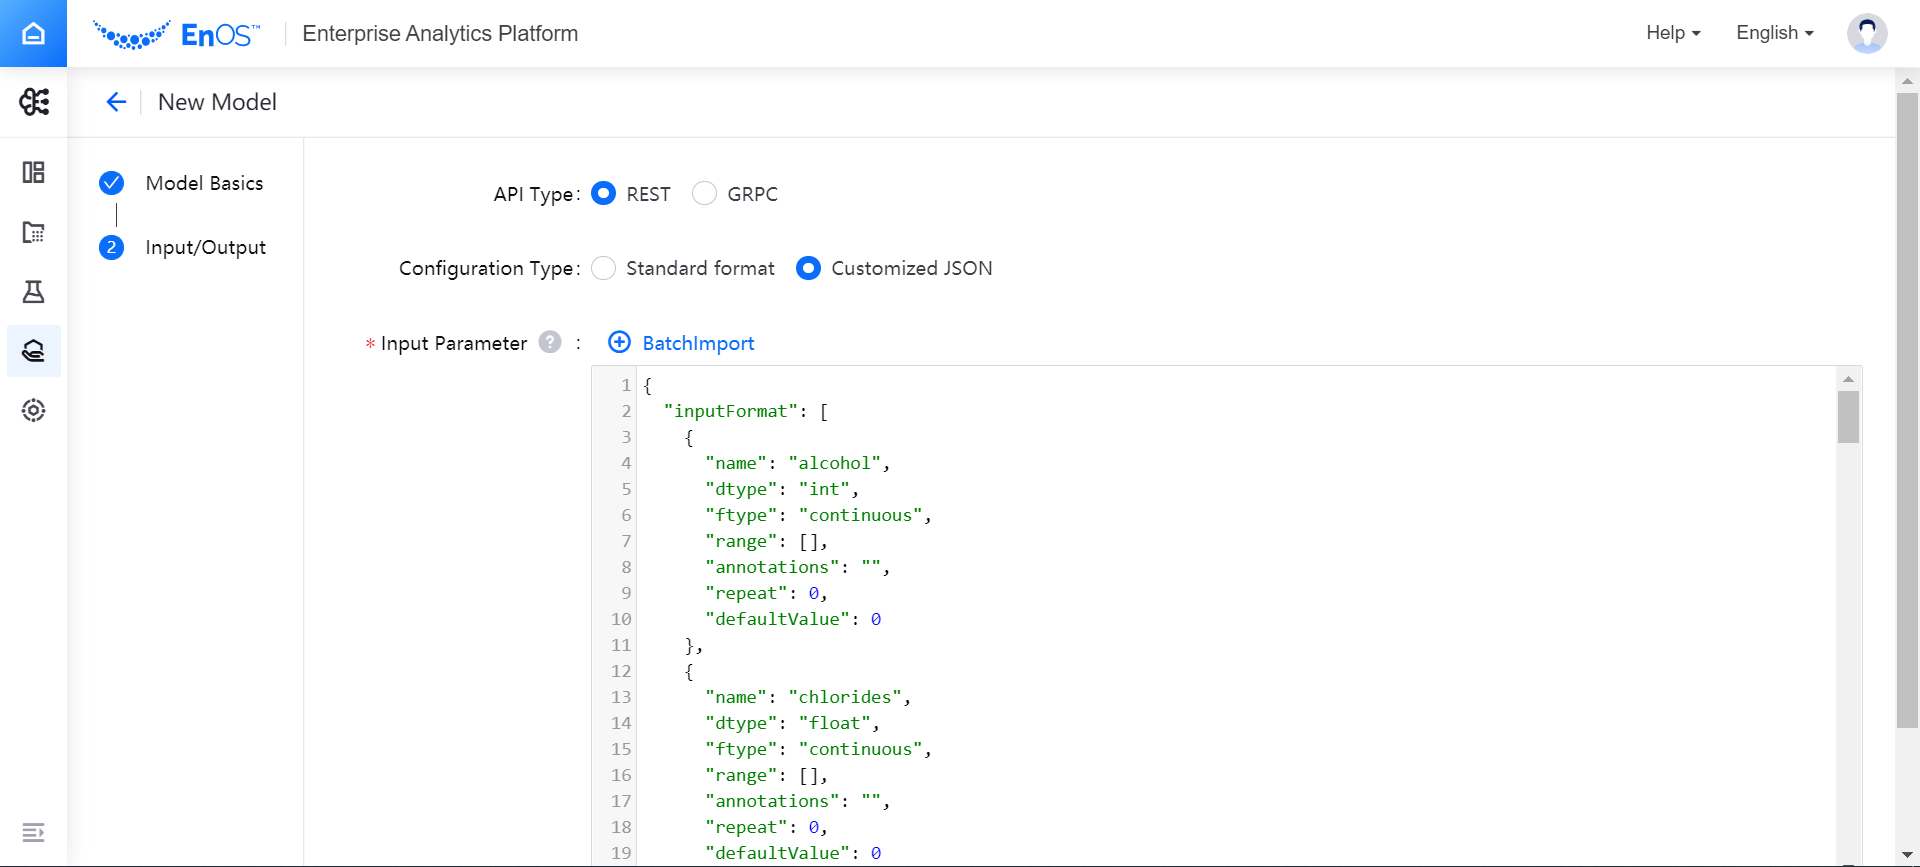
Note
All versions of the model will share this data input and output configuration. When staging model versions, it is necessary to ensure that the feature input of all model versions is completely consistent with the target output and the data input and output configuration defined when the model is registered so as to ensure that the work objectives of all model versions are consistent.
For Image Input Data Type
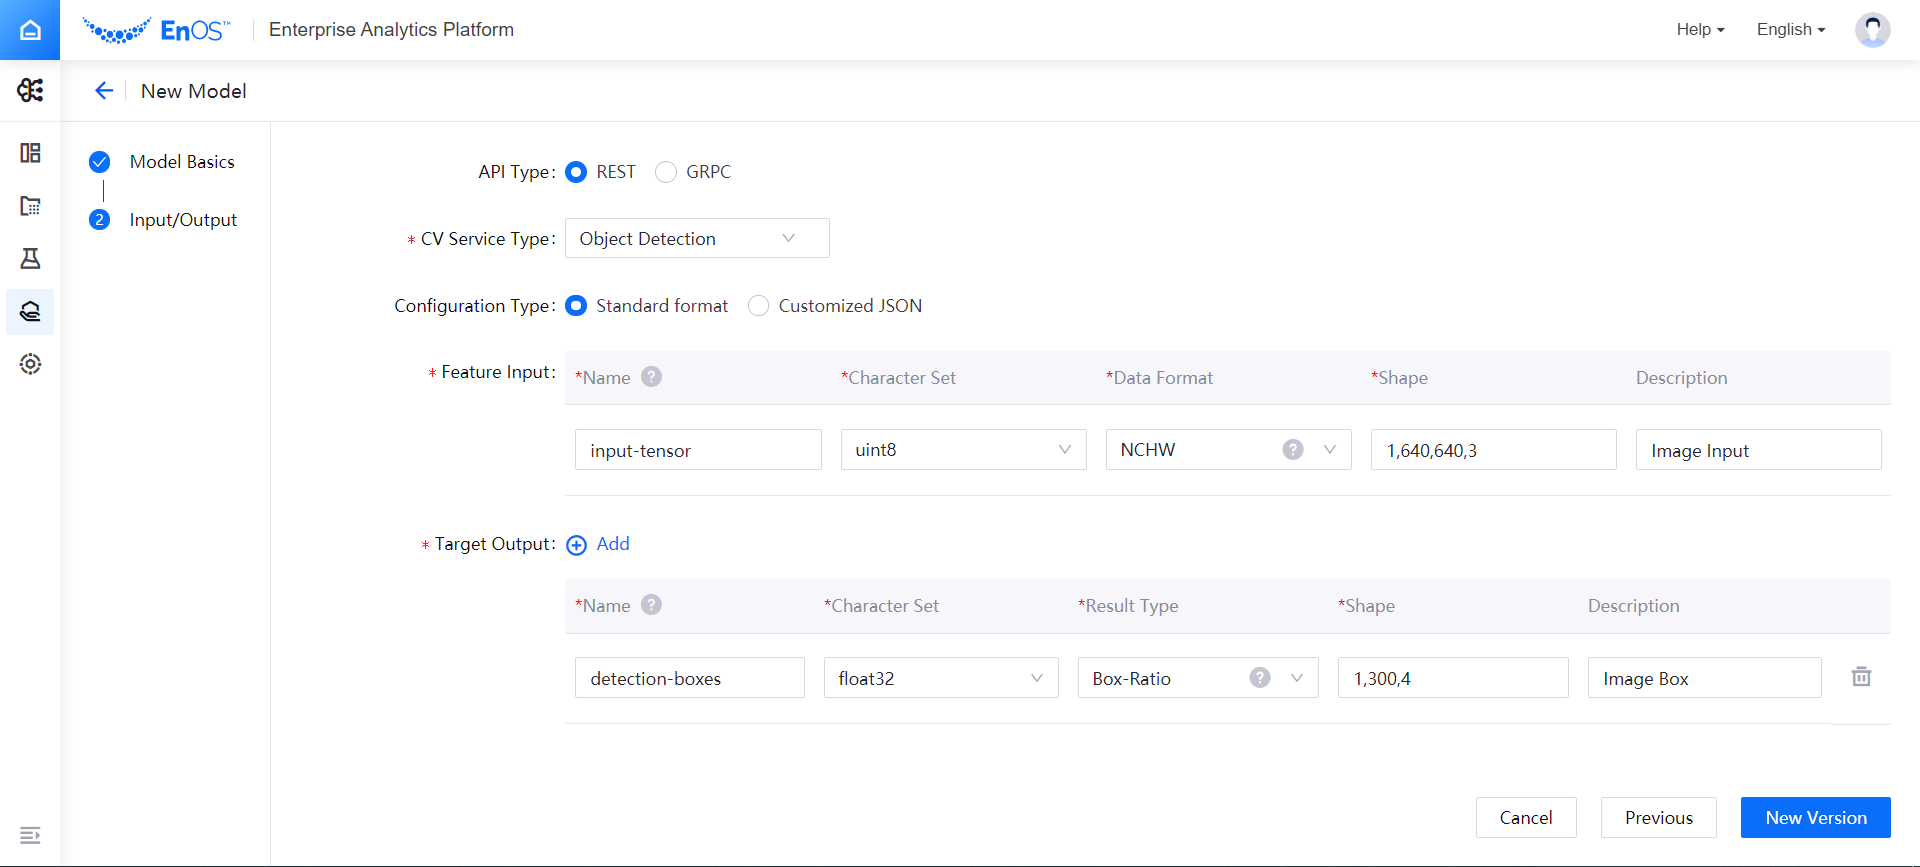
For image input data type (Image), complete the following data input and output configuration of the model:
API Type: Select the API type to call the model service:
REST: The service can be invoked through a browser, and the HTTP API requests are sent in text form, which can be read and created by humans without the need to install a client.
GRPC: It adopts a magnitude message format, is suitable for low-latency & high-throughput communication microservices and multi-language mixed development environment, and provides good support for two-way streaming media.
CV Service Type: Select the computer visualization service type:
Image Classification: For a given input image, the image classification job determines the category of the image.
Object Detection: The target type is recognized through machine learning, and the target is identified in the reasoning process and framed in the image.
Configuration Type: Select the feature input and output method (standard data format or customized JSON input)
If you choose Standard format, you need to add and define data input and output parameters one by one in Feature Input and Target Output, as shown in the following figure:
Note
The image data type allows only 1 feature input and multiple target output.
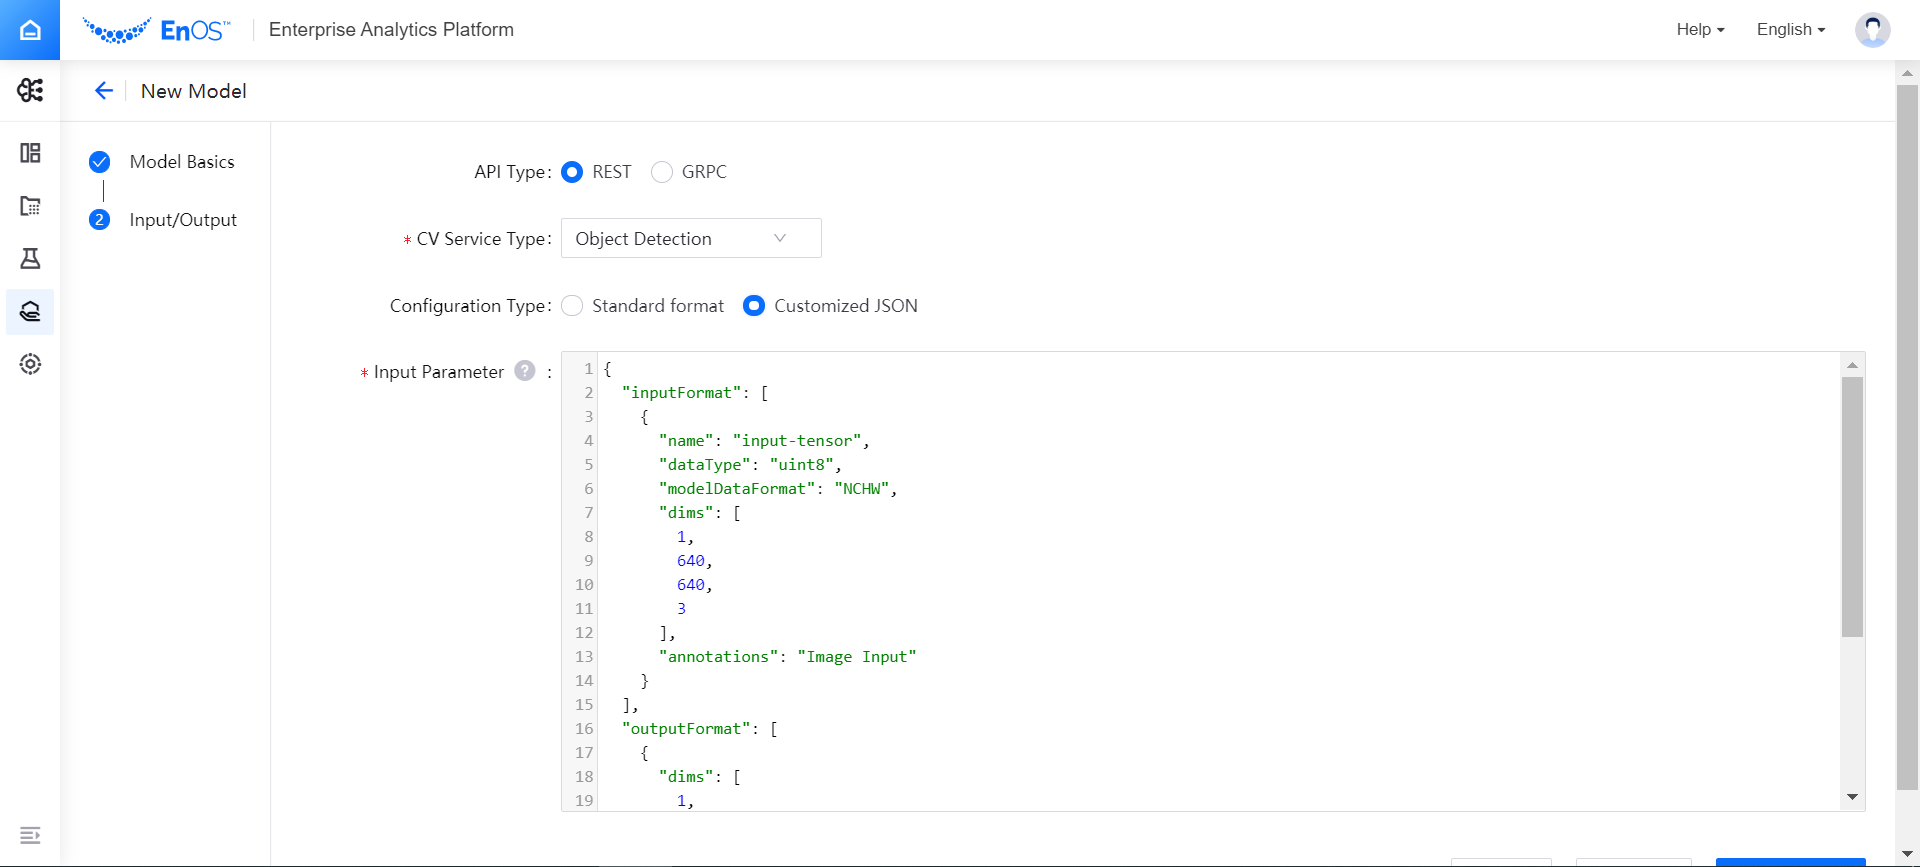
If you choose to Customized JSON, you can enter the defined JSON input and output parameters into the input box to complete the data input and output configuration.
Note
All versions of the model will share this data input and output configuration. When staging model versions, it is necessary to ensure that the feature input of all model versions is completely consistent with the target output and the data input and output configuration defined when the model is registered so as to ensure that the work objectives of all model versions are consistent.
When the input and output configuration of the model is completed, select New Version to complete the basic information of the registered model.
Next Step
After completing the model registration, you can import the prepared model file and stage the first version of the model. For more information, see Stage a Model Version.