Developing Advanced Pipelines
For advanced stream processing pipelines, the system pipeline outputs data records that are needed by the pipelines to different Kafka topics. The corresponding data input Kafka topic is selected in the configuration of downstream stream processing pipeline, for saving computing resources efficiently.
Designing an Advanced Pipeline
Prerequisites
Before creating an advanced stream processing pipeline, ensure that your organization has requested for the Stream Processing - Message Queue resource through the Resource Management page.
The EnOS Stream Processing Service provides multiple versions of system operator libraries and supports uploading custom operator libraries. Before designing stream data processing pipelines, you need to install the needed version of operator library. For more information, see Installing an Operator Library or Template.
Take the following steps to develop an advanced stream processing pipeline.
Log in to the EnOS Management Console, select Stream Processing > Pipeline Designer, and click the + icon above the list of stream processing pipelines.
On the New Pipeline window, select the Advanced pipeline type.
Select New to create the stream processing pipeline. You can also choose to import a configuration file to create the pipeline quickly.
Enter the name and description of the stream processing pipeline.
From the Operator Version drop-down list, select the installed system operator library or custom operator library.
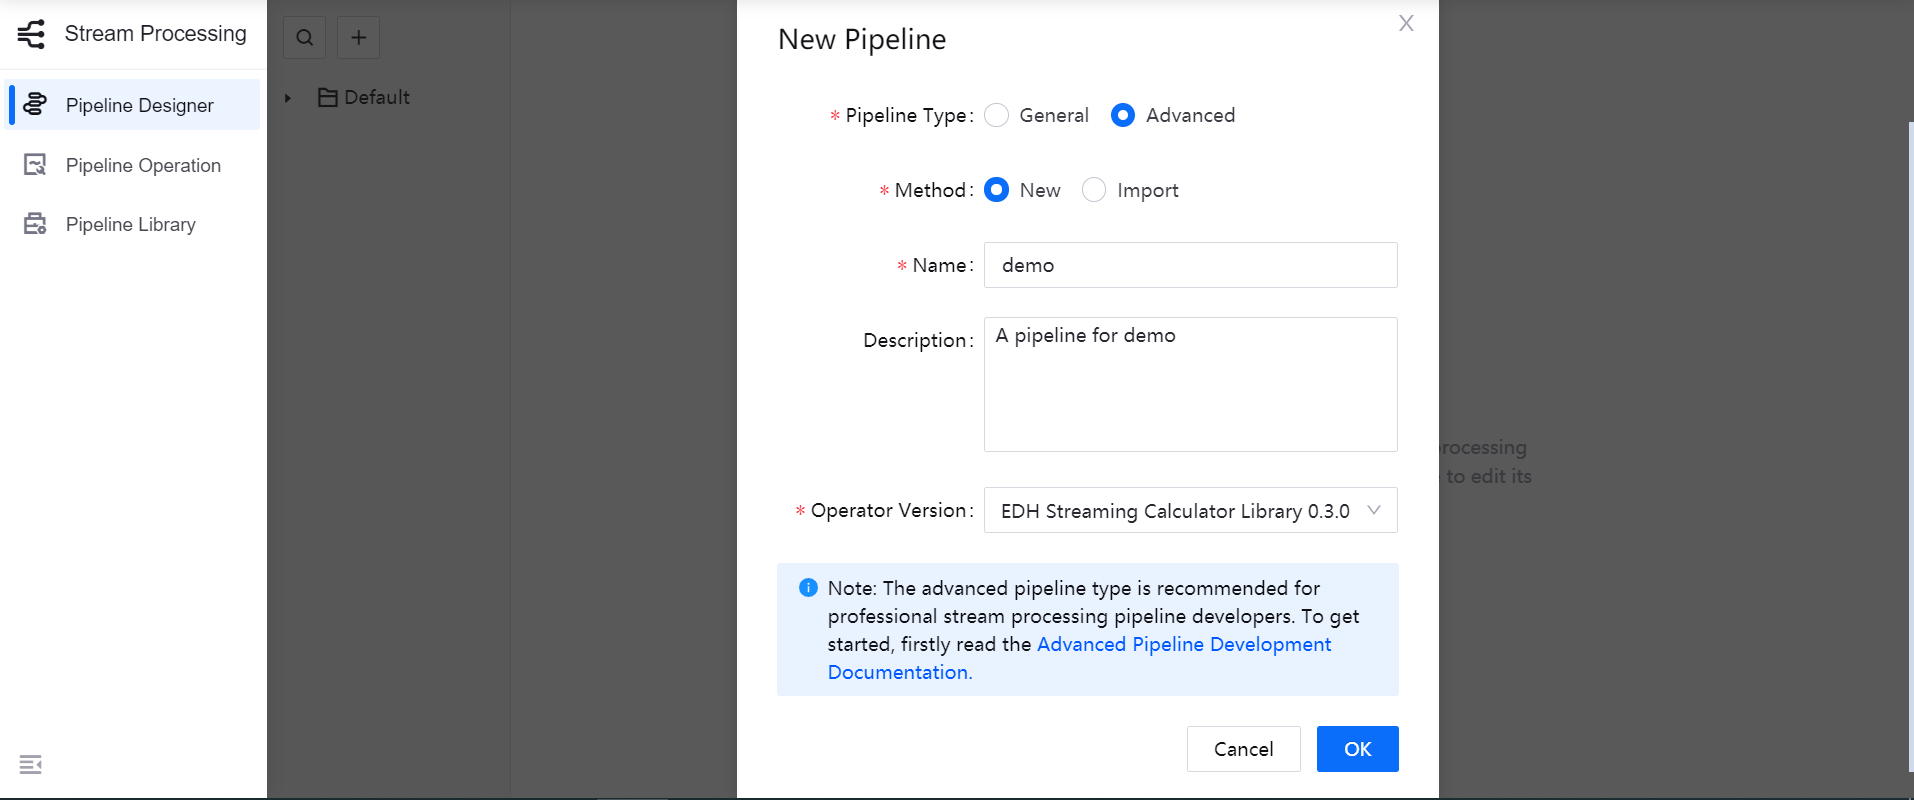
Click OK to create the stream processing pipeline with the basic settings above.
Designing the Stream Processing Pipeline
Follow the steps below to design the stream processing pipeline with stages.
On the pipeline designing canvas, select a stage you want to use (like the Point Selector stage) from the Stage Library in the upper right corner of the page to add it to the canvas.
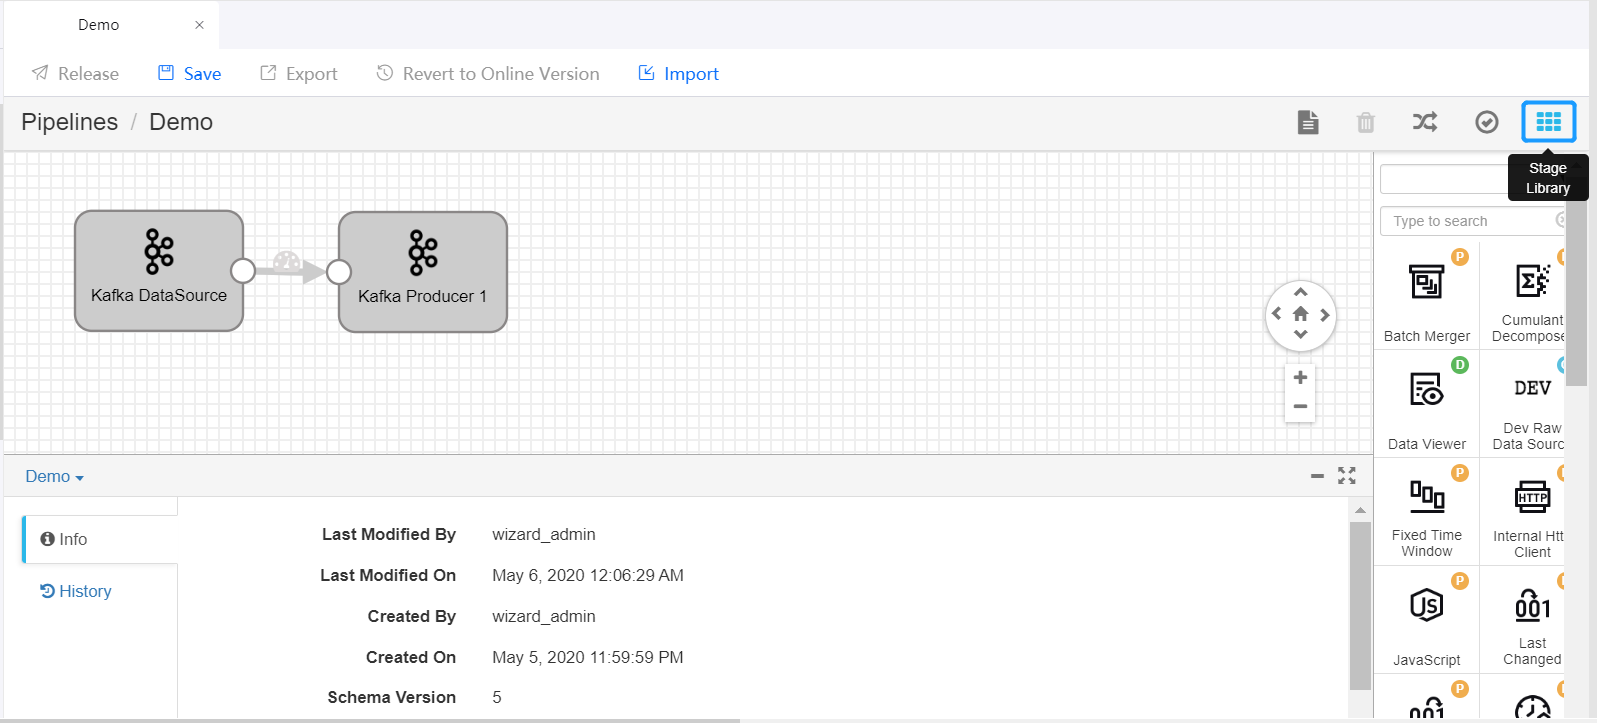
Delete the arrow connecting the Kafka DataSource and Kafka Producer stages and connect the Data Source stage to the new stage by clicking the output point of the Data Source stage and dragging it to the input point of the new stage. Do the same to connect the new stage to the Producer stage to complete adding the new stage to the pipeline. Click on the new stage and complete the parameter configuration.
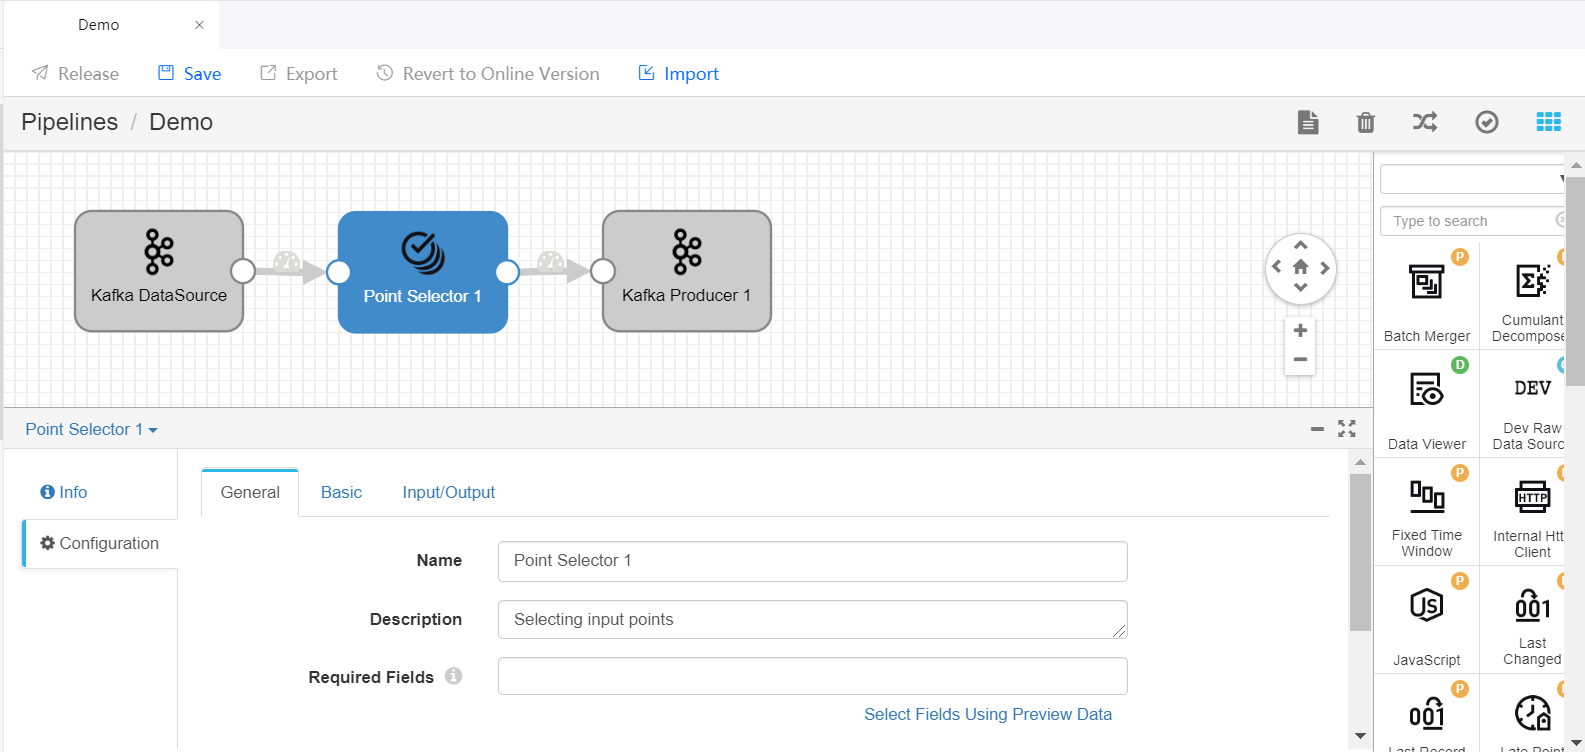
Repeat steps 1 and 2 to add more stages to the pipeline and complete the parameter configuration of the added stages.
Click Save in the tool bar to save the configuration of the pipeline.
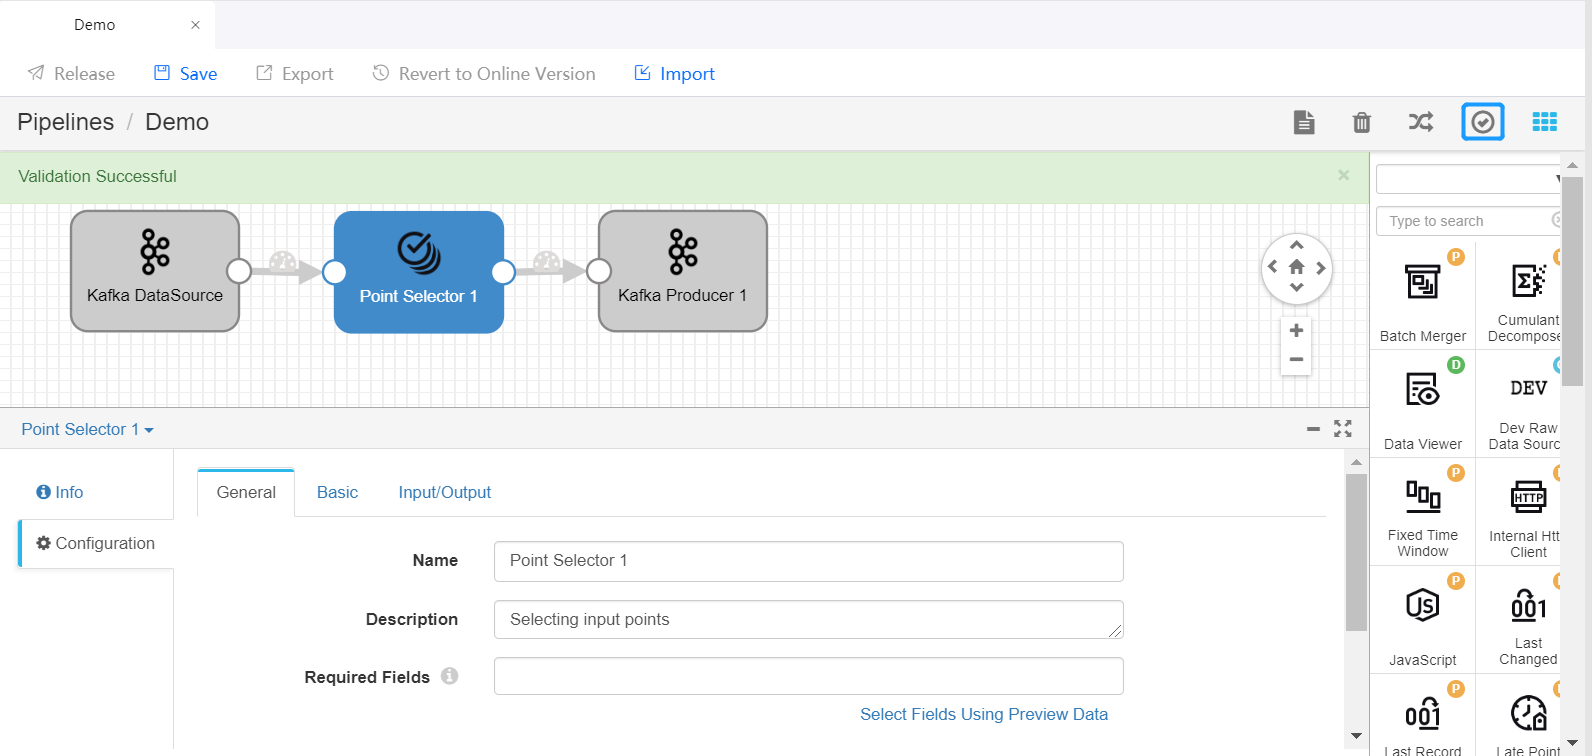
Click the Validate icon
 in the tool bar to check the parameter configuration of the stages. If the validation fails, update the configuration accordingly.
For more information about designing stream processing pipelines, see StreamSets User Guide.
Importing Stream Processing Pipeline Configuration
Besides designing the stream processing pipeline with operators, you can complete the pipeline configuration quickly by importing the configuration file of an existing pipeline on the pipeline design page.
On the pipeline design page, click Import on the tool bar.
Navigate and select the configuration file of the existing pipeline, and click OK.
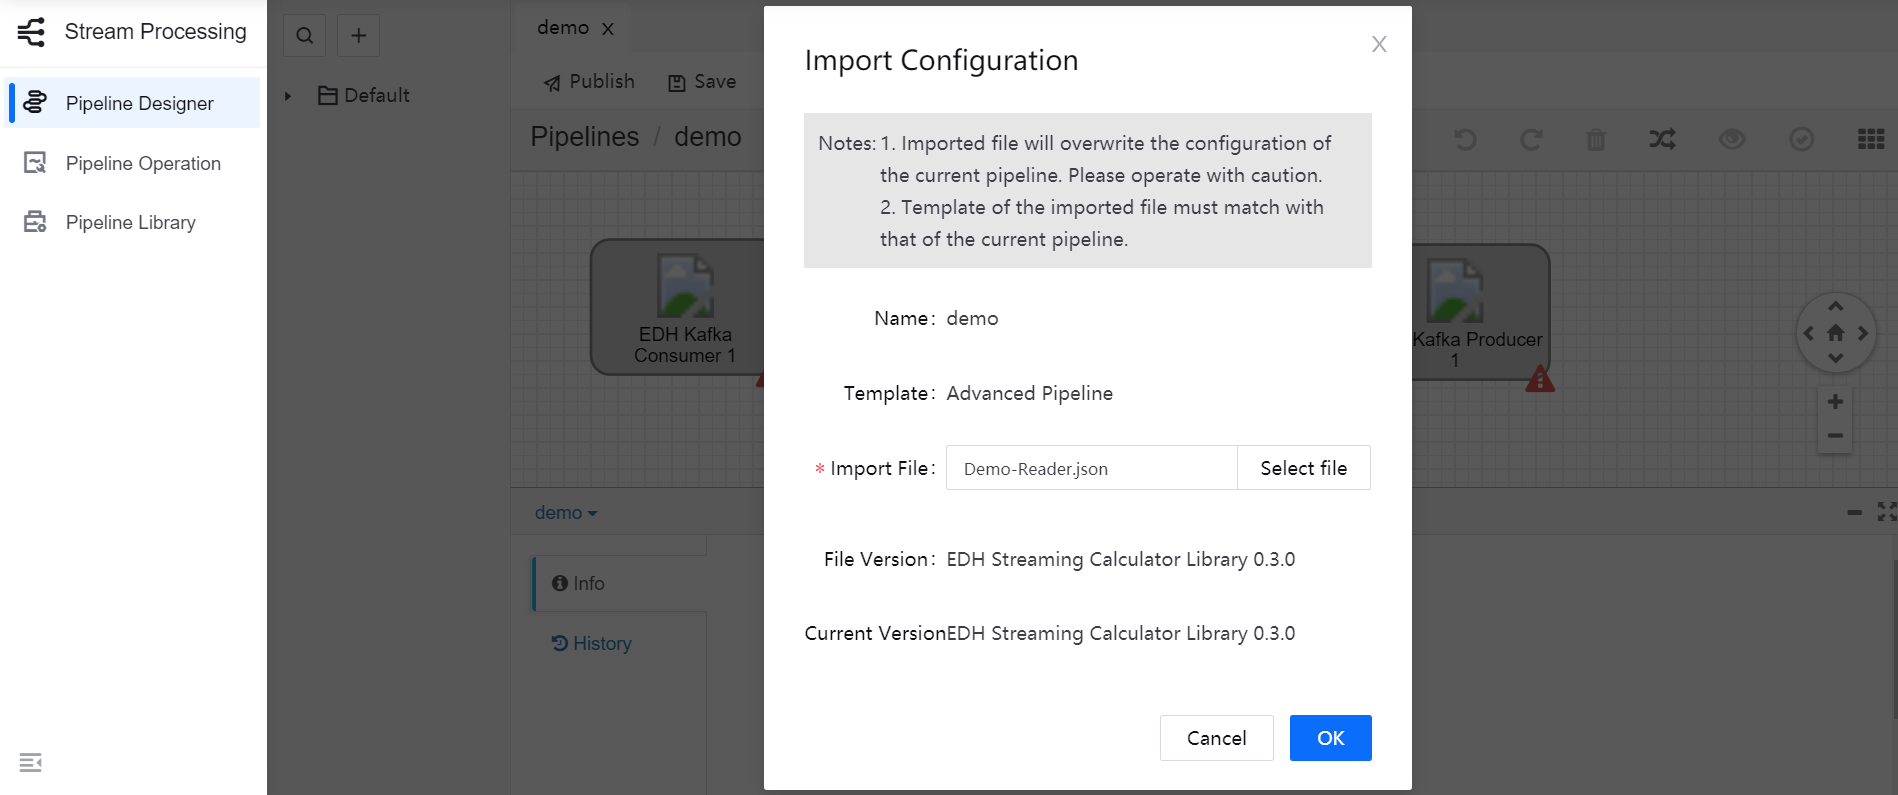
Edit and save the imported pipeline configuration based on your business needs.
Publishing and Running the Pipeline
If the validation is successful, you can publish the pipeline online and start it.
Click Release in the tool bar to publish the pipeline.
Open the Stream Processing > Pipeline Operation page, view the published pipeline, whose status is PUBLISHED by default.
Complete the running resource configuration and alarm settings for the pipeline, ensure that the required system pipelines are running, and click the Start icon
 to start running the pipeline.
For more information about pipeline operations, see Maintaining Stream Processing Pipelines.
Configuring Custom Topic Reader and Topic Writer
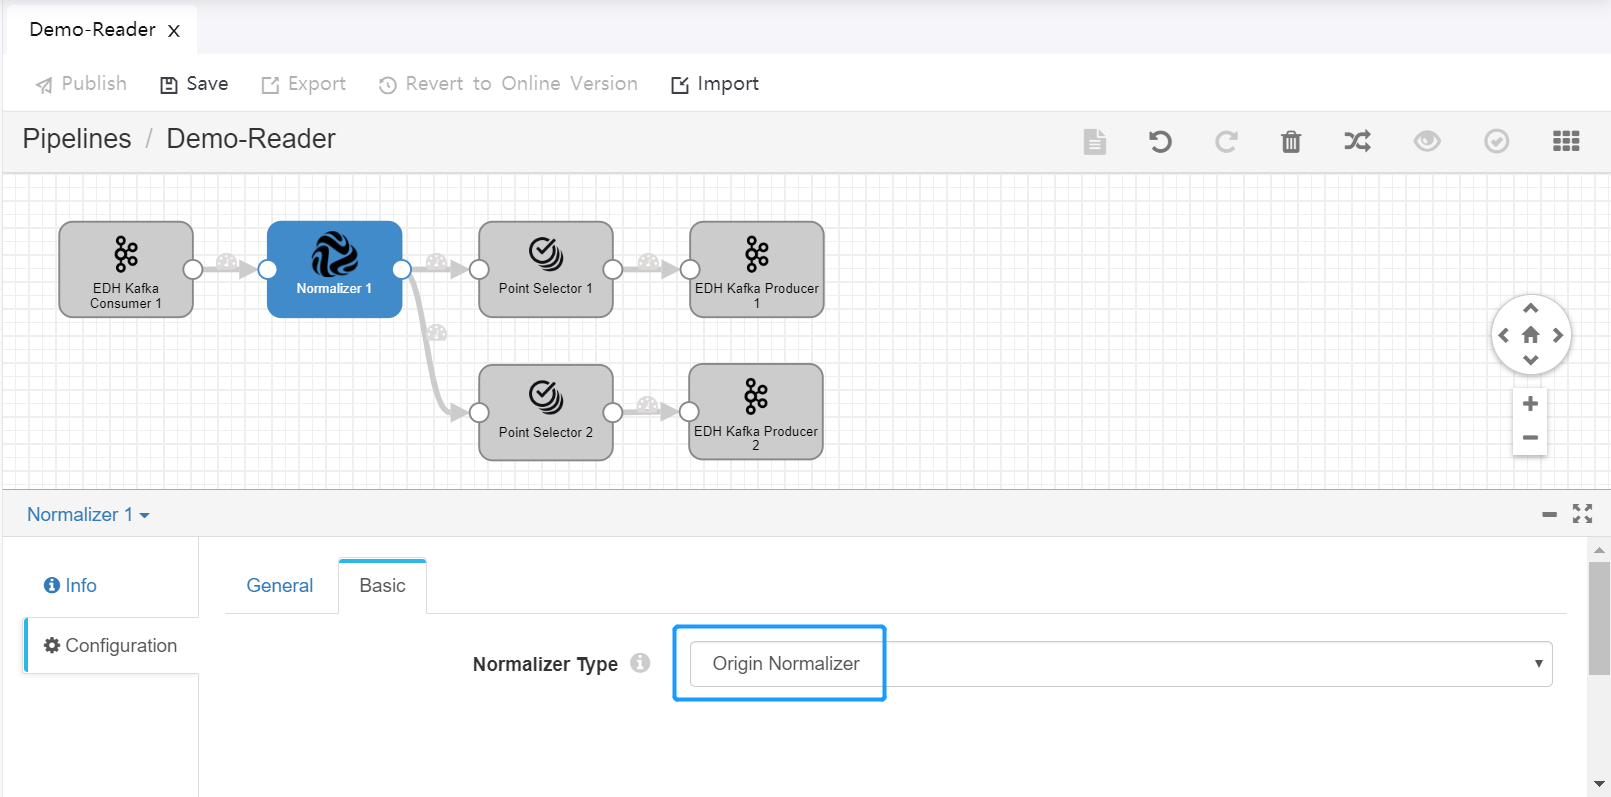
The feature of advanced stream processing pipeline is that the Normalizer operator is provided. When configuring the custom Topic Reader pipeline, you need to use the Point Selector operator to select the needed measurement points and output the measurement point data records to different topics.
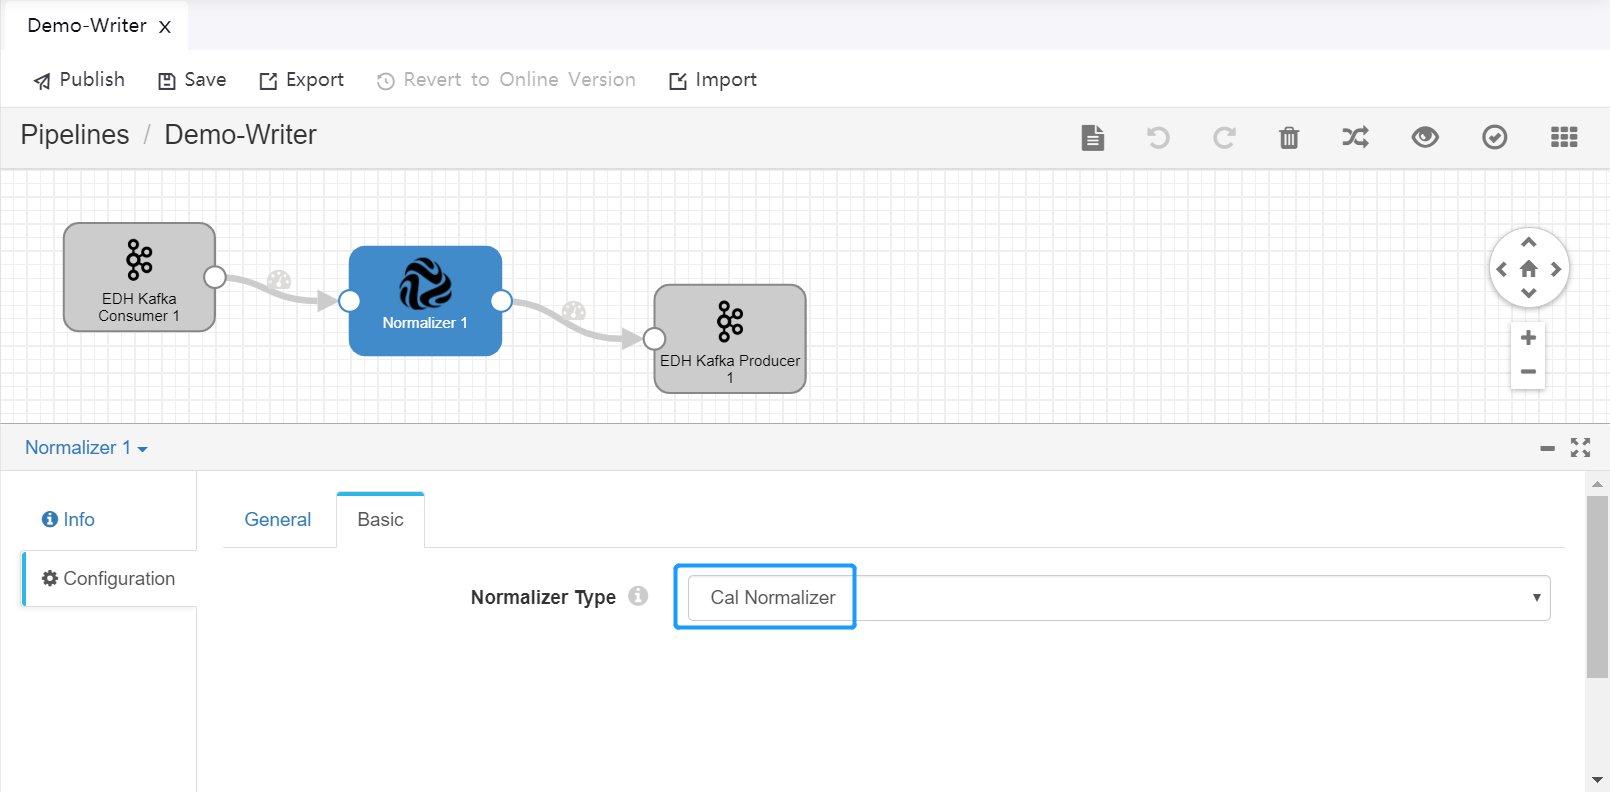
Topic Writer pipeline can output data records in the Internal topic to the Cal topic, which will be consumed by downstream applications.
Notes:
When configuring custom Topic Reader pipeline and Topic Writer pipeline, try not to use operators other than the EDH Kafka Consumer, EDH Kafka Producer, and Point Selector.
When publishing user pipelines, the automatically generated system pipelines (Data Reader and Data Writer) can be optionally stopped.
To output data records to the Cal Topic directly, ensure that the data records meet the following format requirement:
Records without Data Quality
{
 "orgId":"1b47ed98d1800000",
 "modelId":"inverter",
 "modelIdPath":"/rootModel/inverter",
 "payload": {
     "measurepoints": {
         "tempWithoutQuality":23.4
     },
     "time":1542609276270,
     "assetId":"zabPDuHq"
 },
 "dq": {
     "measurepoints": {
         "tempWithoutQuality":1
     },
     "time":1542609276270,
     "assetId":"zabPDuHq"
 }
}
Records with Data Quality
{
 "orgId":"1b47ed98d1800000",
 "modelId":"inverter",
  "modelIdPath":"/rootModel/inverter",
 "payload":
  {
         "measurepoints": {
             "tempWithQuality": {
                 "value":23.4,
                 "quality”:0
             }
         },
         "time":1542609276270,
         "assetId":"zabPDuHq"
     },
"dq": {
         "measurepoints": {
             "tempWithQuality": 1
         },
         "time":1542609276270,
         "assetId":"zabPDuHq"
     }
}
Field Description
Field |
Corresponding Device Model Field |
Description |
|---|---|---|
orgId |
TSLModel.ou |
Organization ID, to be used by downstream subscription and alert services. |
modelId |
TSLModel.tslModelId |
Model ID (identifier of user defined model), to be used by downstream subscription and alert services. |
modelIdPath |
n/a |
Complete path of user defined model. |
assetId |
TSLInstance.tslInstanceId |
Asset ID, to be used for complying with existing data formats. |
time |
n/a |
Timestamp. |
measurepoints |
TSLIdentifier.identifier |
Measurement point and value.
|
The following figures show the configuration of custom Topic Reader pipeline and Topic Writer pipeline.
Topic Reader
Topic Writer
Operator Documentation
For detailed information about the function, parameter configuration, and output of the available operators, see the Operator Documentation.