Track Notebook Running Instances
The MI Lab is integrated with MLflow and supports generating models in Mlflow after running the model training codes in JupyterLab. The generated models can be directly registered and deployed in the MI Hub.
For more information about Mlflow, see MLflow Documentation.
Prerequisites
You should have prepared the model training codes that can run in JupyterLab.
Run Model Training Codes
You can run and debug the model training codes in JupyterLab by following these steps:
Open the list of notebook instances in MI Lab, and open the notebook instance.
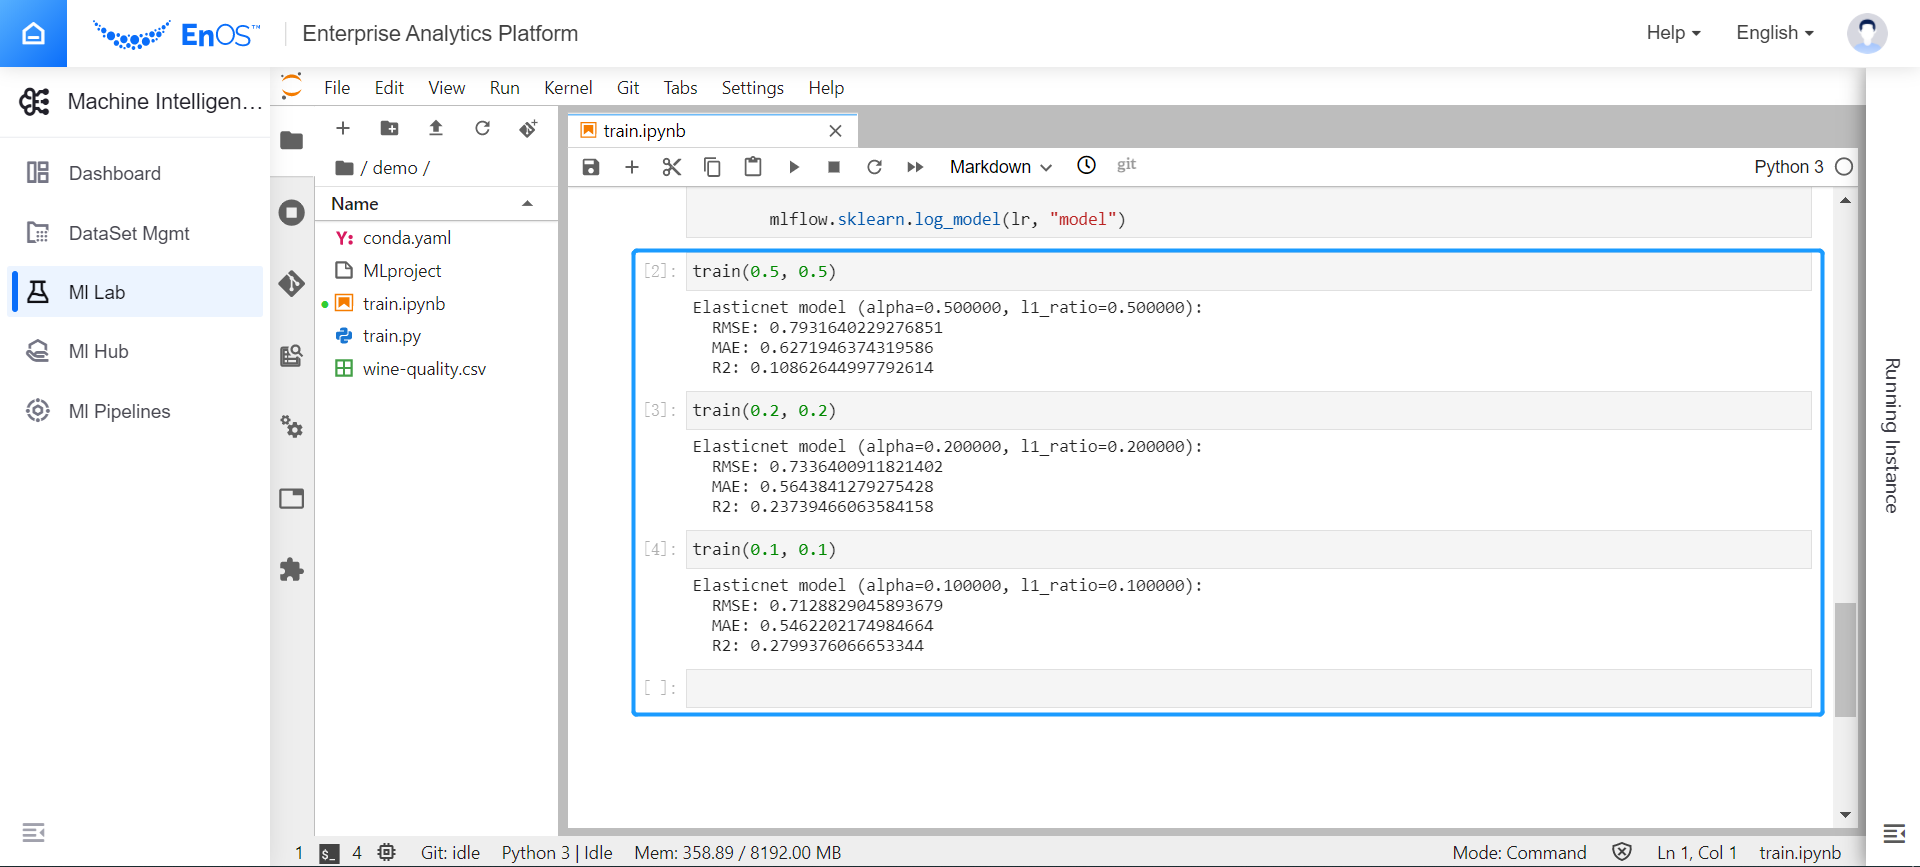
From the left File Browser, browse and open a model training code file, e.g.
train.ipynb.
Click the Run the selected cells icon above the model training code file box to execute each line of the cell code in the model training code file to ensure that the codes run successfully.

View Instance Running Results
After the model training code runs successfully, you can view the instance running results in MLflow by following these steps:
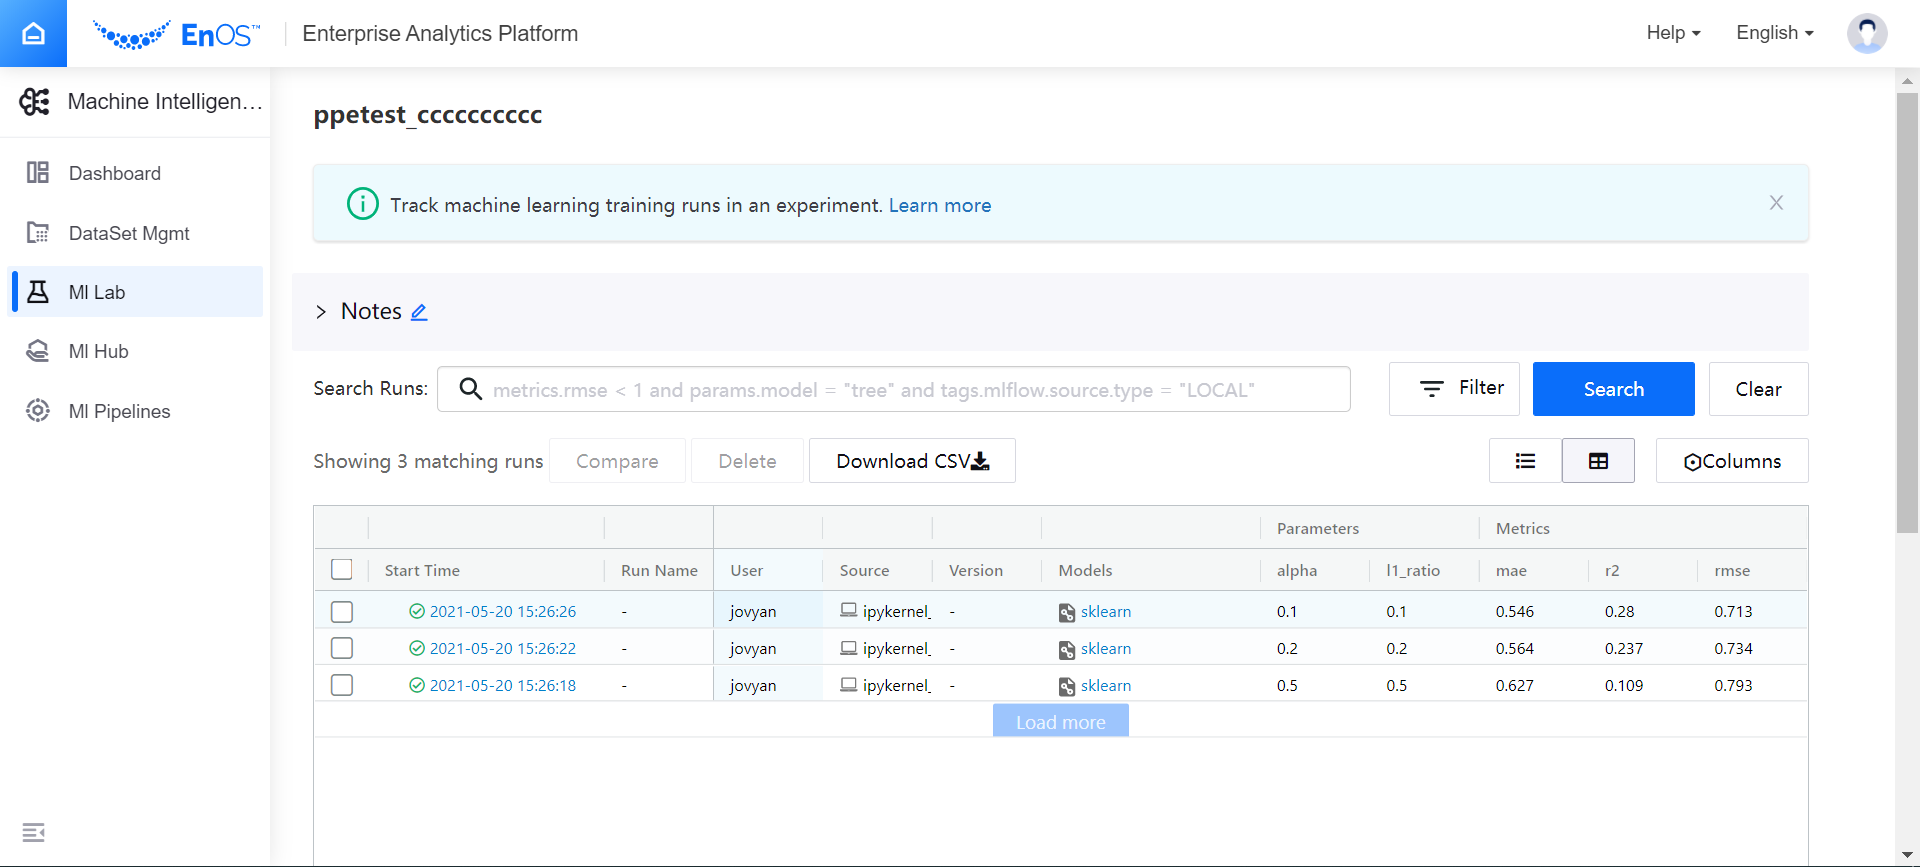
Expand the Running Instance window on the right side of the page to view the list of instance running results. Once a line of codes runs successfully, its running results will be displayed in the list of running instances.

Click the Go to Lab icon in the upper right corner of the Running Instance window to view all successful and failed running results of the notebook instance in MLflow.

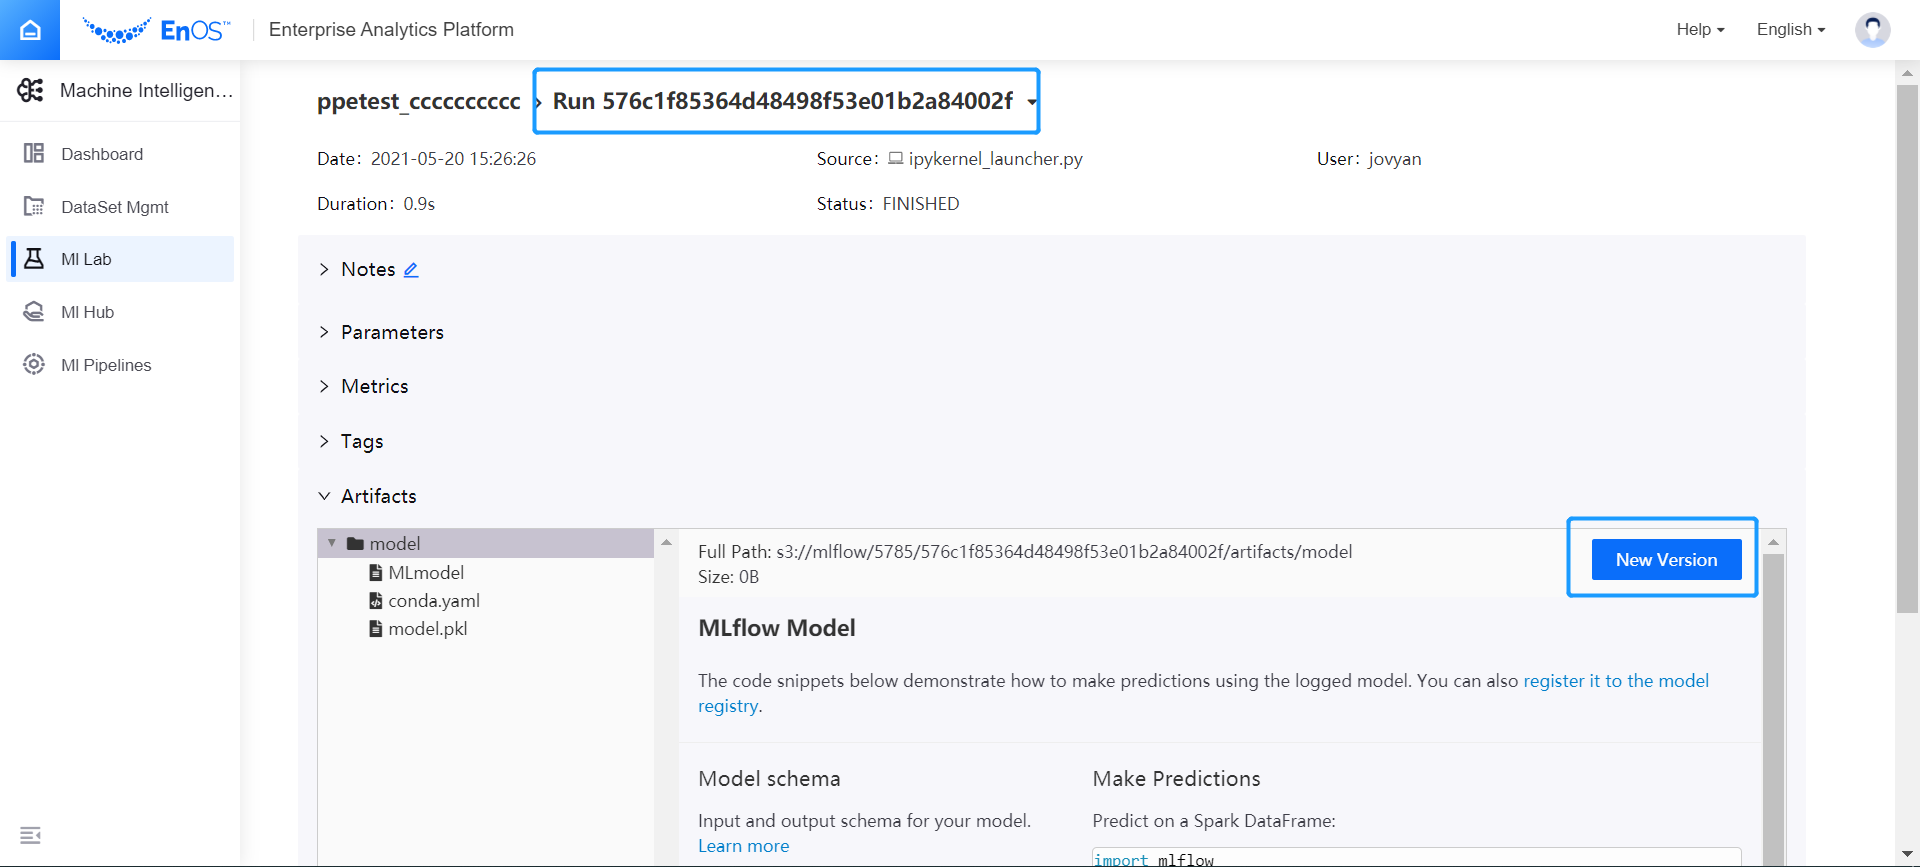
Click a successful running result and view the newly created model in the Artifacts column. The
Run IDdisplayed on the upper part of the page is the name of the model. When registering a model in the MI Hub, you can register a model by this name.
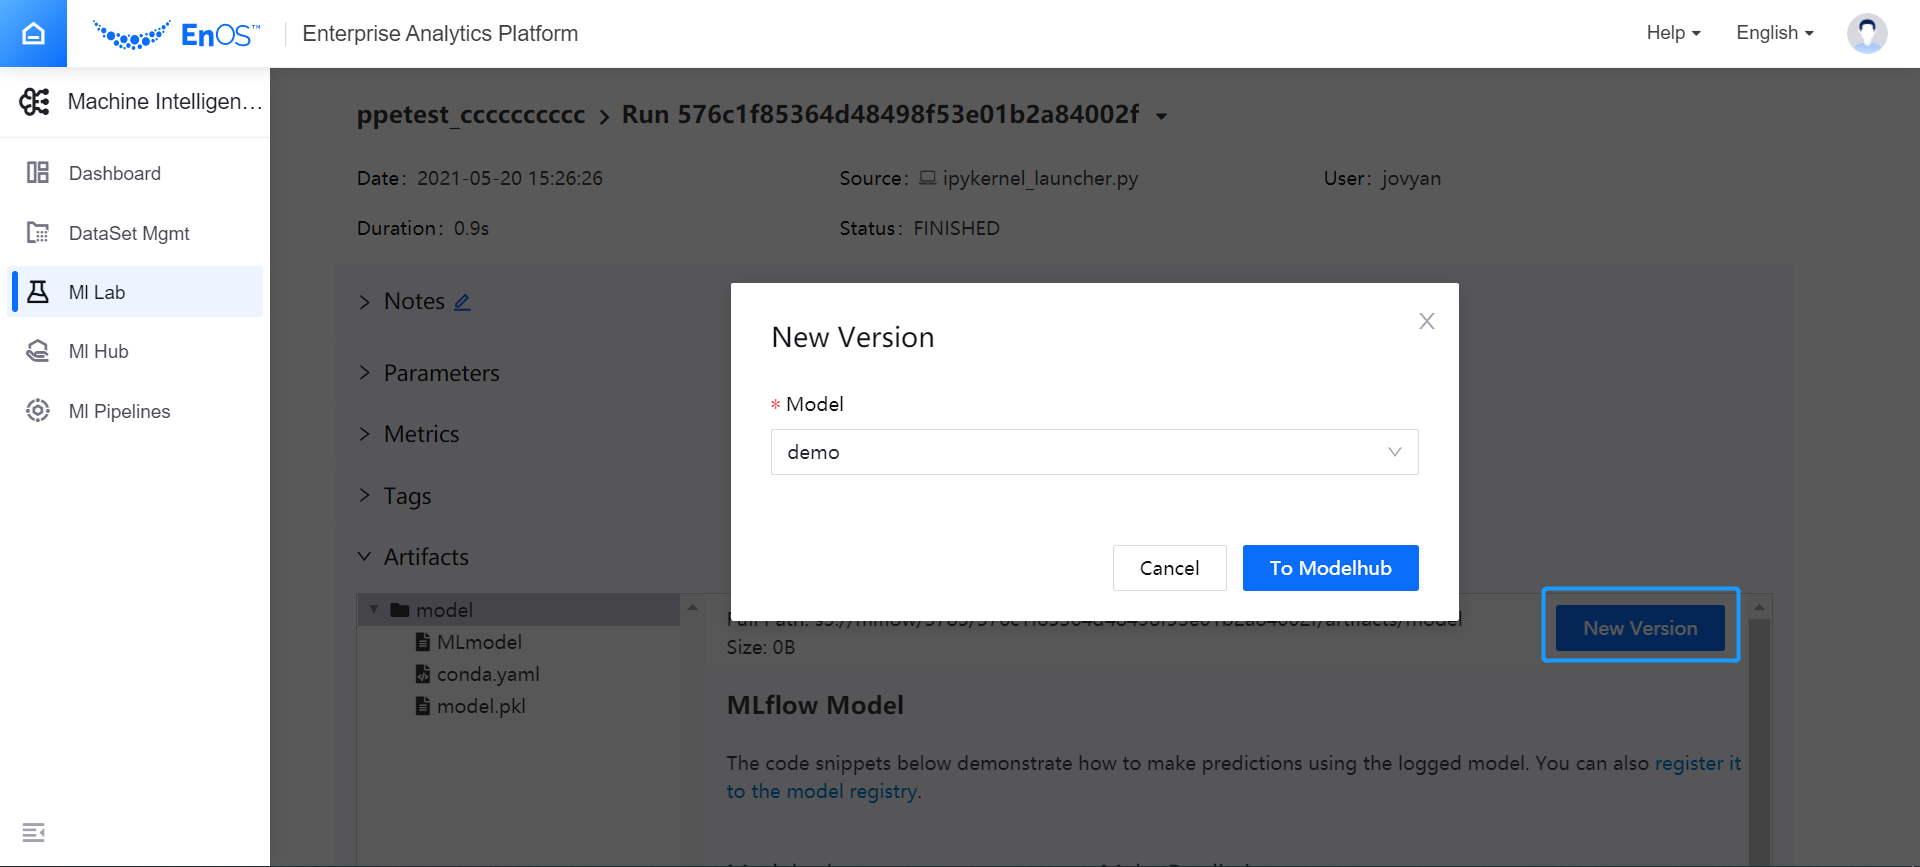
Optional: In the Artifacts section, select the model folder, and then click the New Version button to stage the model as a version of an existing model in MI Hub.
In the New Version pop-up window, select a model that is registered in MI, and then click To Modelhub. The New Version window in MI Hub will be open. Follow the wizard to complete staging the model version.
