Managing Projects
This section describes how the project owner can create an application DevOps project and manage project members.
Creating a Project
From the Organization menu in the left navigation barl, select your organization to open the list of projects that are created.
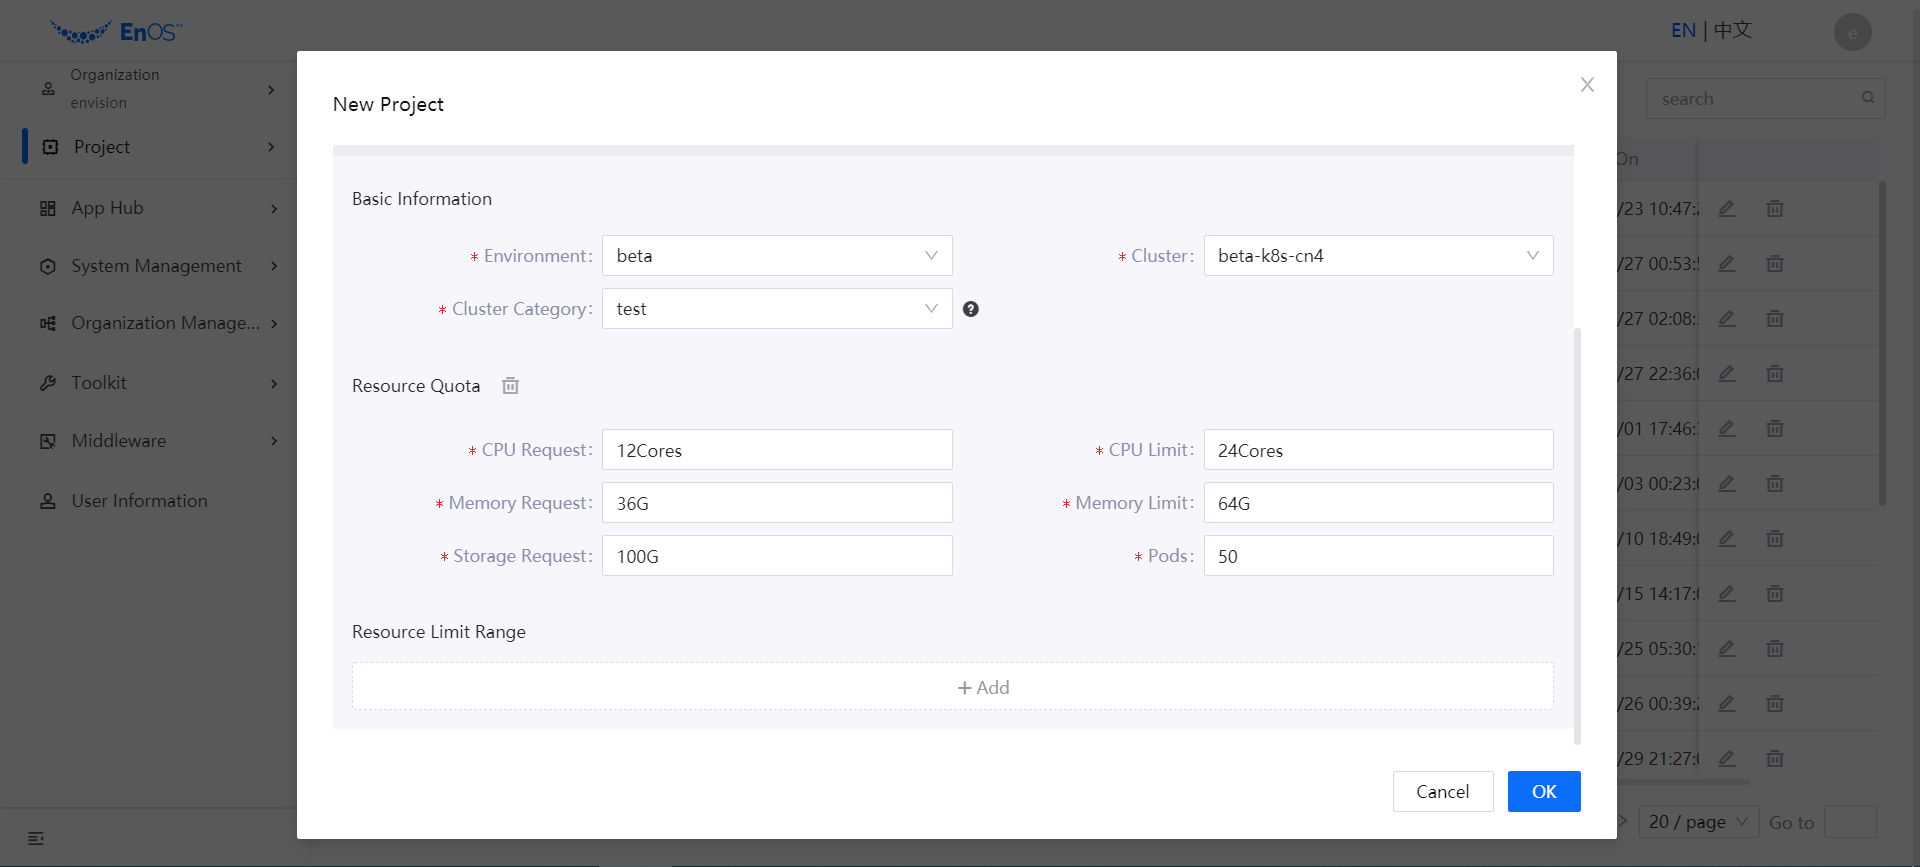
Click New Project, and enter the project name and description.
In the Effective Cluster section, select the environment and cluster to run the project:
Environment: Select the environment for running the project.
Cluster: Select the cluster for running the project.
Cluster Category: Select the category of the cluster (for controlling user roles who can operate on the cluster and clusters that can be selected when deploying applications through pipeline).

Specify the resource quota for the effective cluster, including CPU and memory request and limit, storage request, and the number of Pods. For more information on resource quotas, see Resource Quotas.

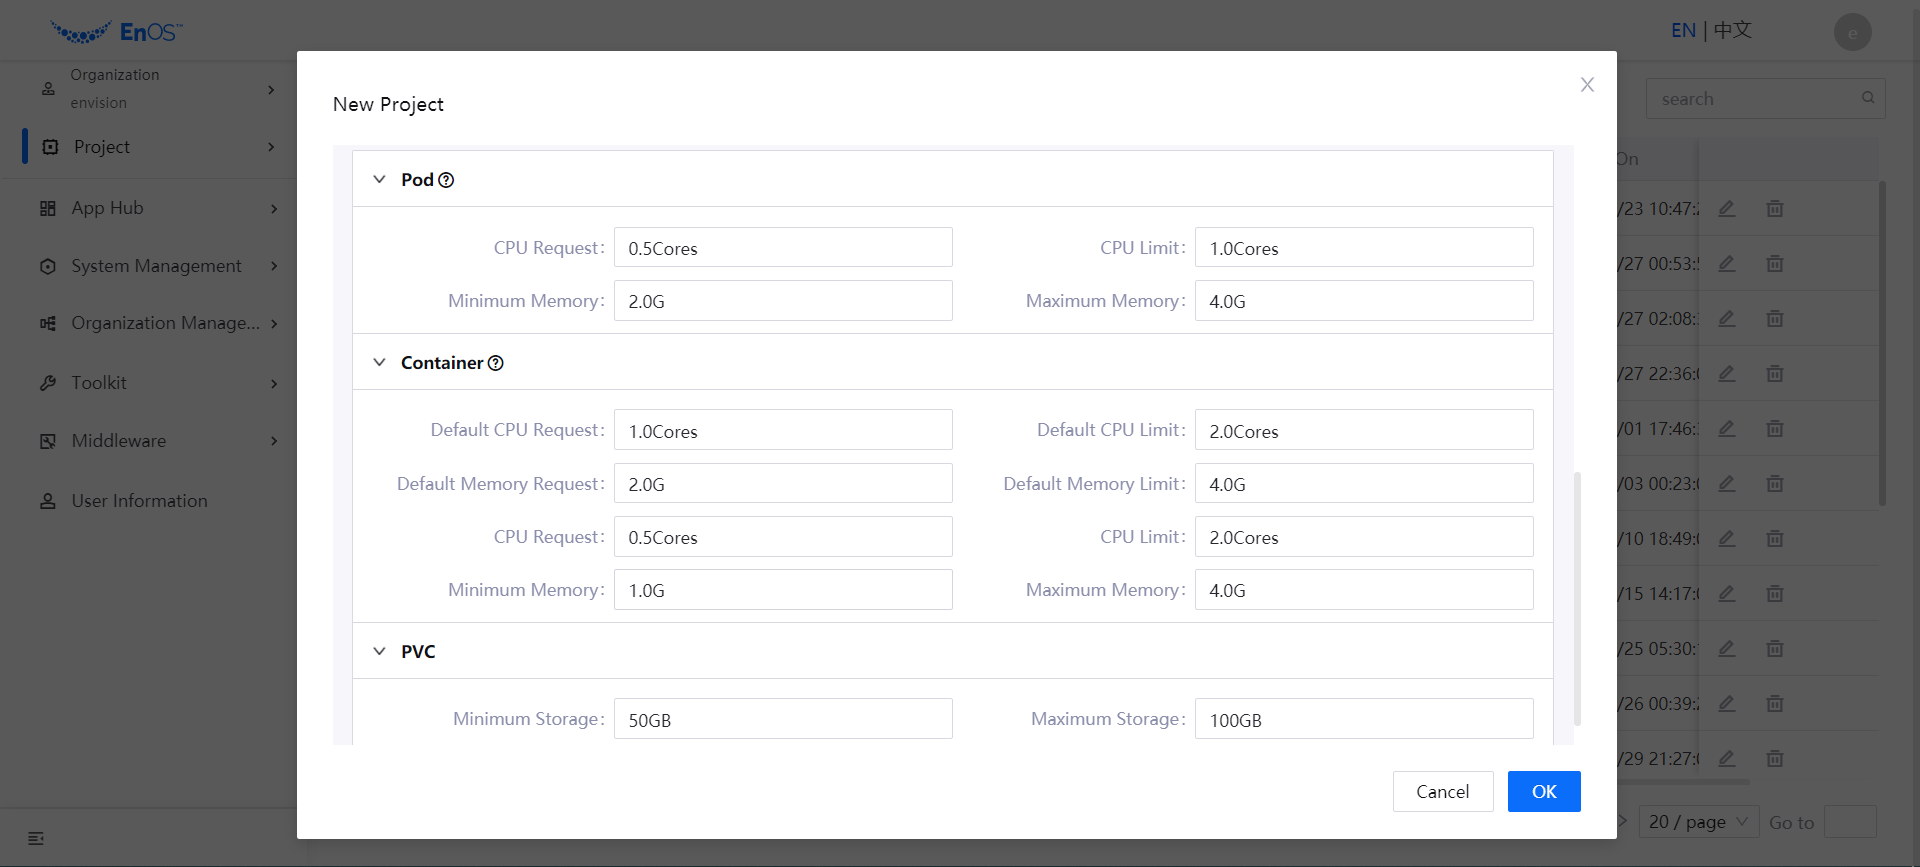
Specify the resource limit range for the effective cluster, including the resource limit range for Pods, container, and storage.

Click OK to create the project.
The created project will be displayed in the project list. Click the project name to open the project overview page to view the basic information of the project, effective clusters, project members, and application pipeline overview.
To update the project information, fine the project in the project list and click the Edit icon. To delete a project, click the Delete icon, and confirm.
Managing Project Members
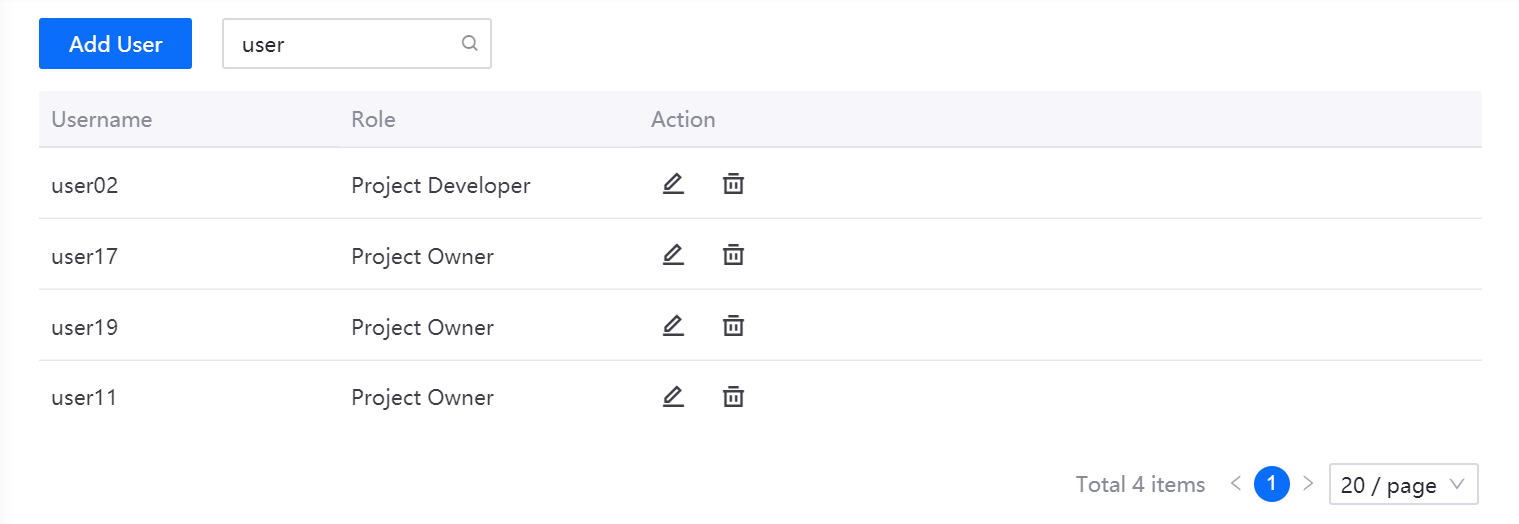
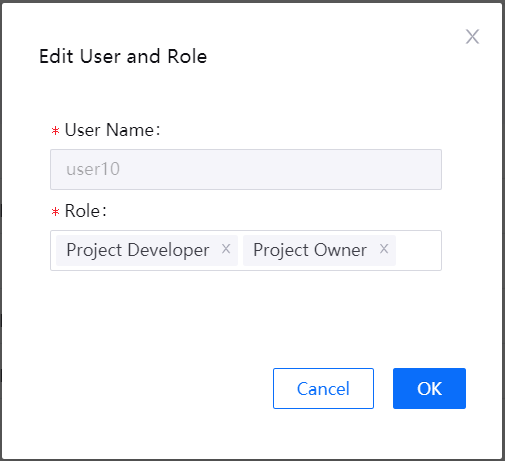
After a project is created, the project administrator can add members to the project, assign roles to the members, or delete members.
Click the project name in All Projects, or select the project in Project list. Then, click the Project Member tab.


