Developing Pipelines
This section describes how to design and develop a pipeline in the editing canvas of the Pipeline Design page.
Browsing Offline Design Page
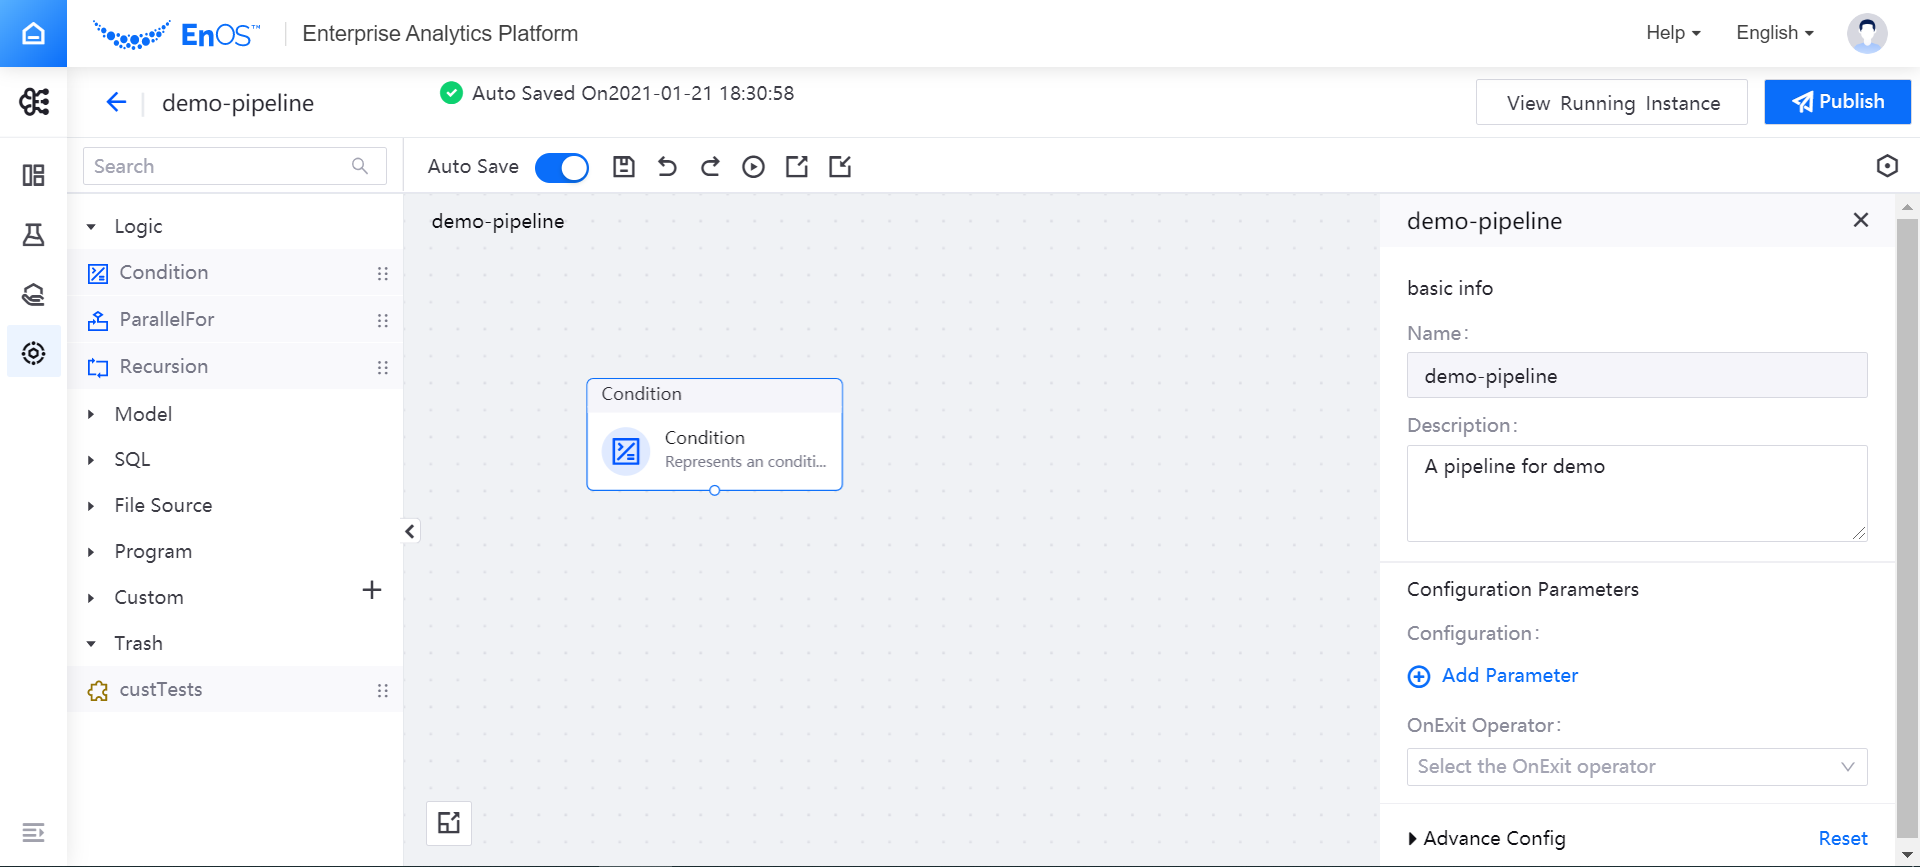
Click Pipeline Designer for the target experiment in the experiment list to enter the offline design editing canvas and start pipeline design and development. The offline design page consists of the following parts:
Operator List
On the left side of the offline design page is a list of various operators, providing logic operators, model operators, SQL operators, file operators, processing operators, custom operators, etc. You can search for operators in the search box at the top of the page.
Editing Canvas
In the middle of the offline design page is the pipeline editing canvas. You can drag and drop the operators you need to the editing canvas to organize the pipeline.
Parameter Configuration
At the right side of the offline design page is the parameter configuration area, where you can configure basic information and parameters for pipelines or operators.
Functional Operations
At the top of the offline design page is the functional operation area, where you can perform the following operations on the pipeline:
Auto Save: Enable or disable the automatic saving of the pipeline information being edited.
Save: Save the pipeline information in the current canvas.
Undo / Redo: Undo or redo the pipeline information in the canvas.
Run: Test run the current pipeline.
Export: Export and save the current pipeline configuration information.
Import: Import the pipeline configuration file saved externally and edit it on the editing canvas.
View Running Instances: You can view the list of pipeline instances that are running online.
Publish: Publish the current pipeline to the production environment. The production environment schedule needs to be set when a pipeline is published for the first time, and after the pipeline is published to the production environment, its state will change from Editing to In Production. If there is already a running instance in the production environment, the newly published pipeline will overwrite that in the production environment.
Orchestrating Pipelines
The pipeline can be orchestrated by dragging and dropping operators to the pipeline editing canvas, setting the configuration information of each operator, and using arrows to connect the operators to indicate the logical dependence among them. Finally, the pipeline can be automatically run by configuring the scheduling period of the entire pipeline.
In this section, the “Coin Toss” scenario is taken as an example, where the Condition operator and the custom flip-coin-op and print-op operators are used to orchestrate the pipeline, and the output result is the upside of the coin.
You can complete the pipeline and operator parameter configuration, and orchestrate the operators into a pipeline by following these steps.
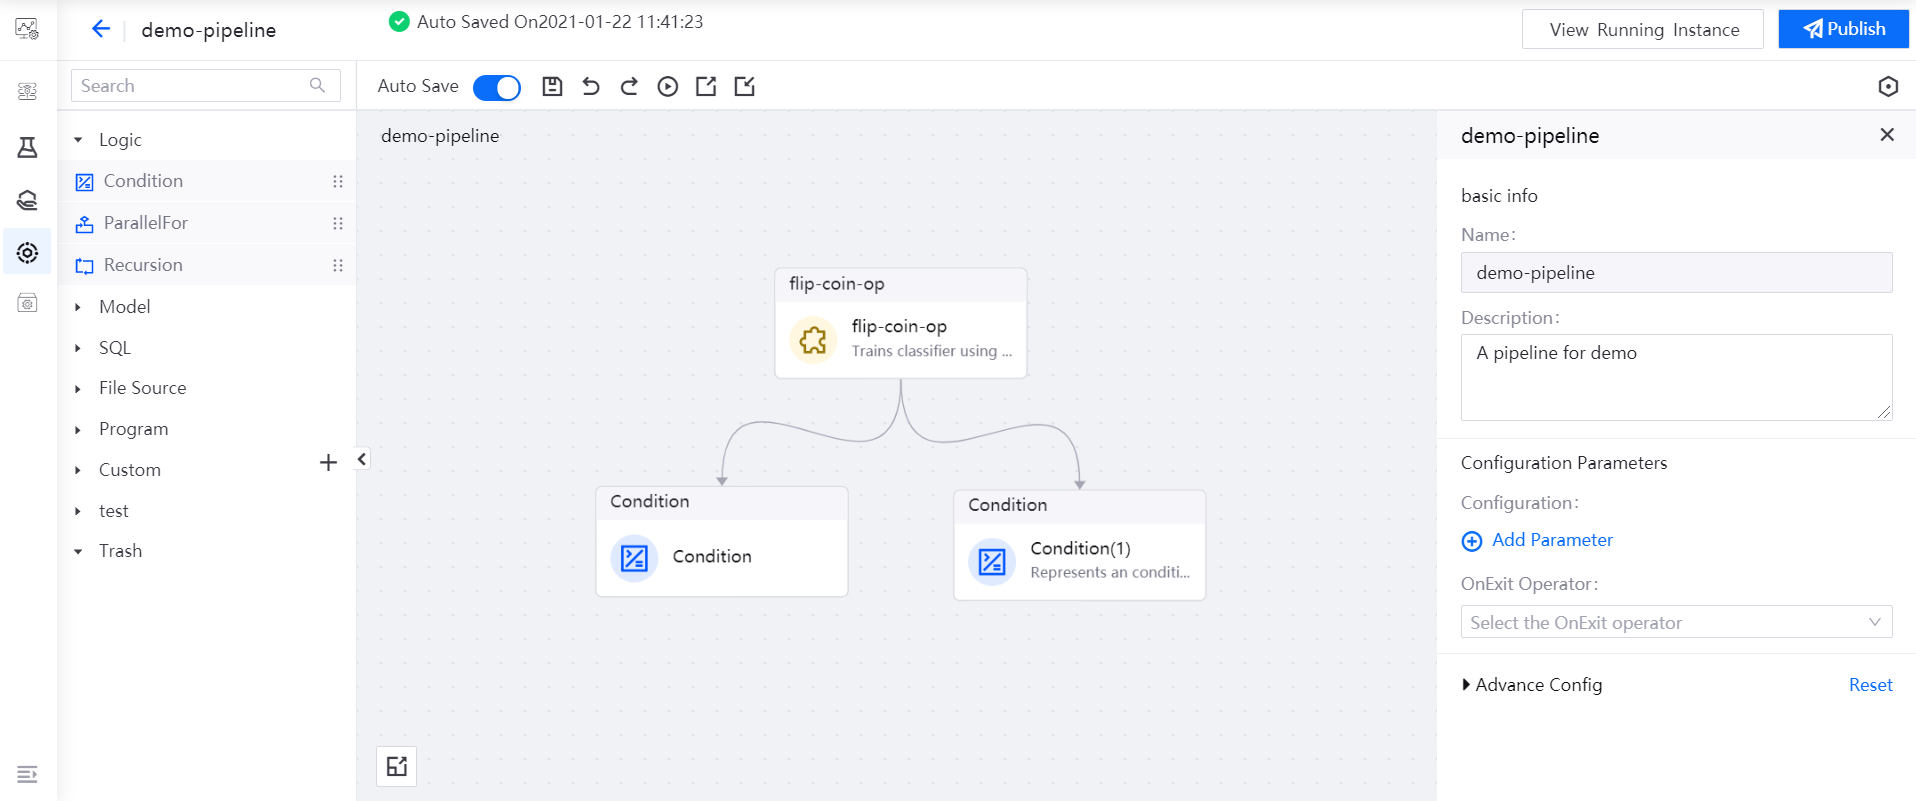
Drag the operators you need to use (1 flip-coin-op operator and 2 Condition operators) to the editing canvas.
Select the Condition operator, and reference the
outputvalue of the flip-coin-op operator as the expression of the Condition operator:flip-coin-op.output == heads.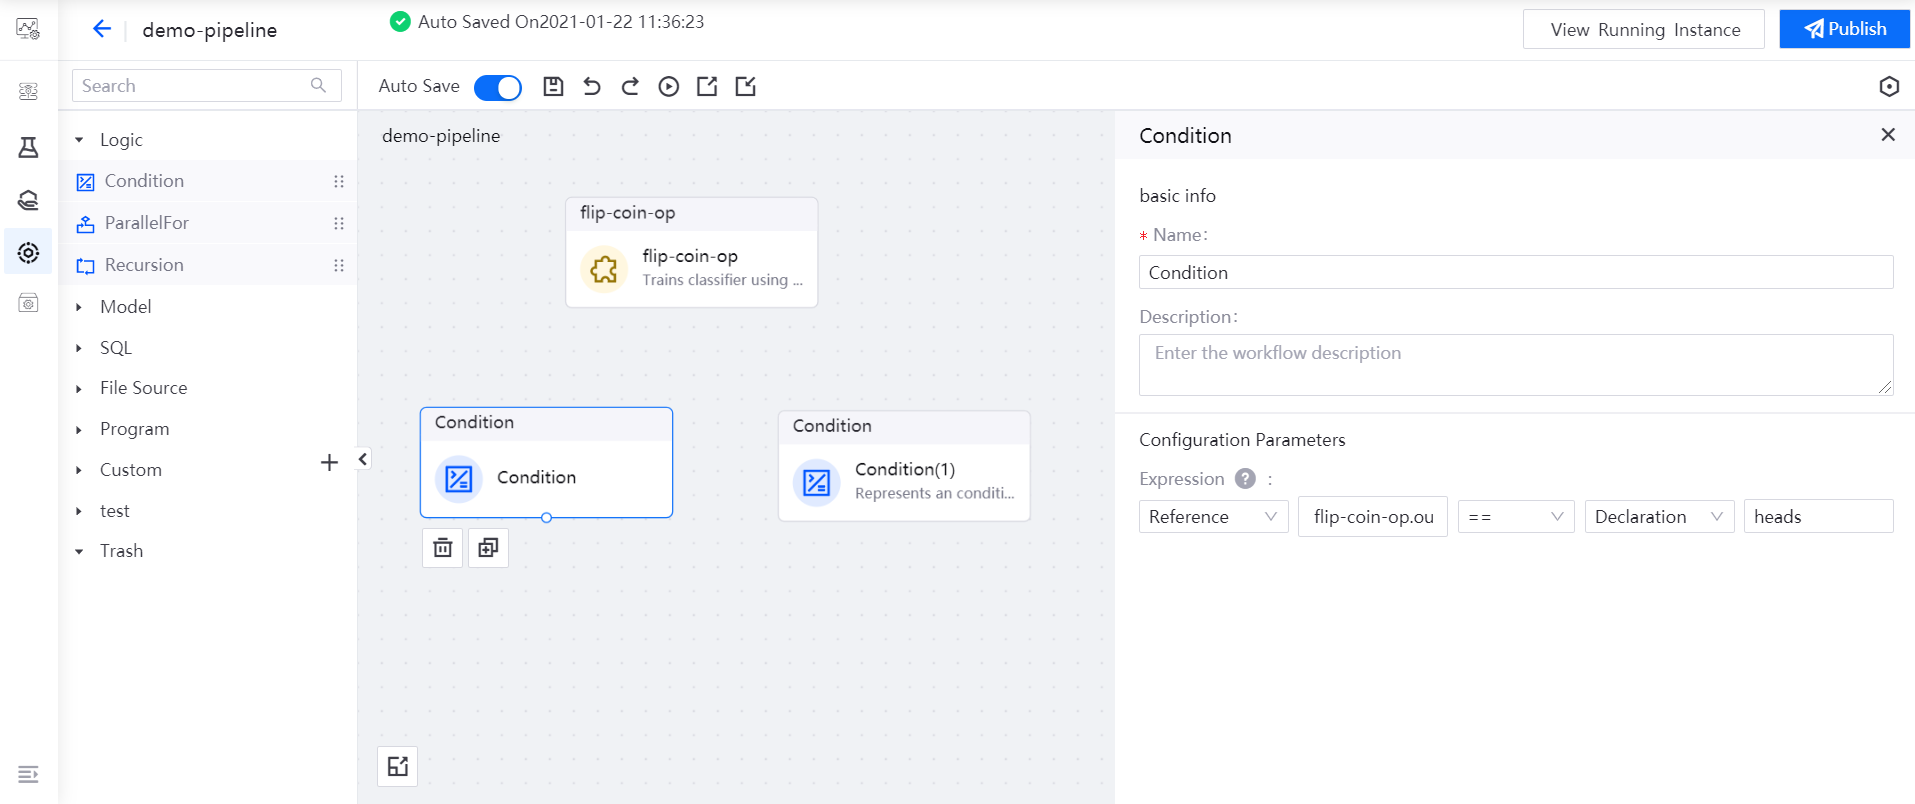
Select the Condition(1) operator, and reference the
outputvalue of the flip-coin-op operator as the expression of the Condition(1) operator:flip-coin-op.output == tails.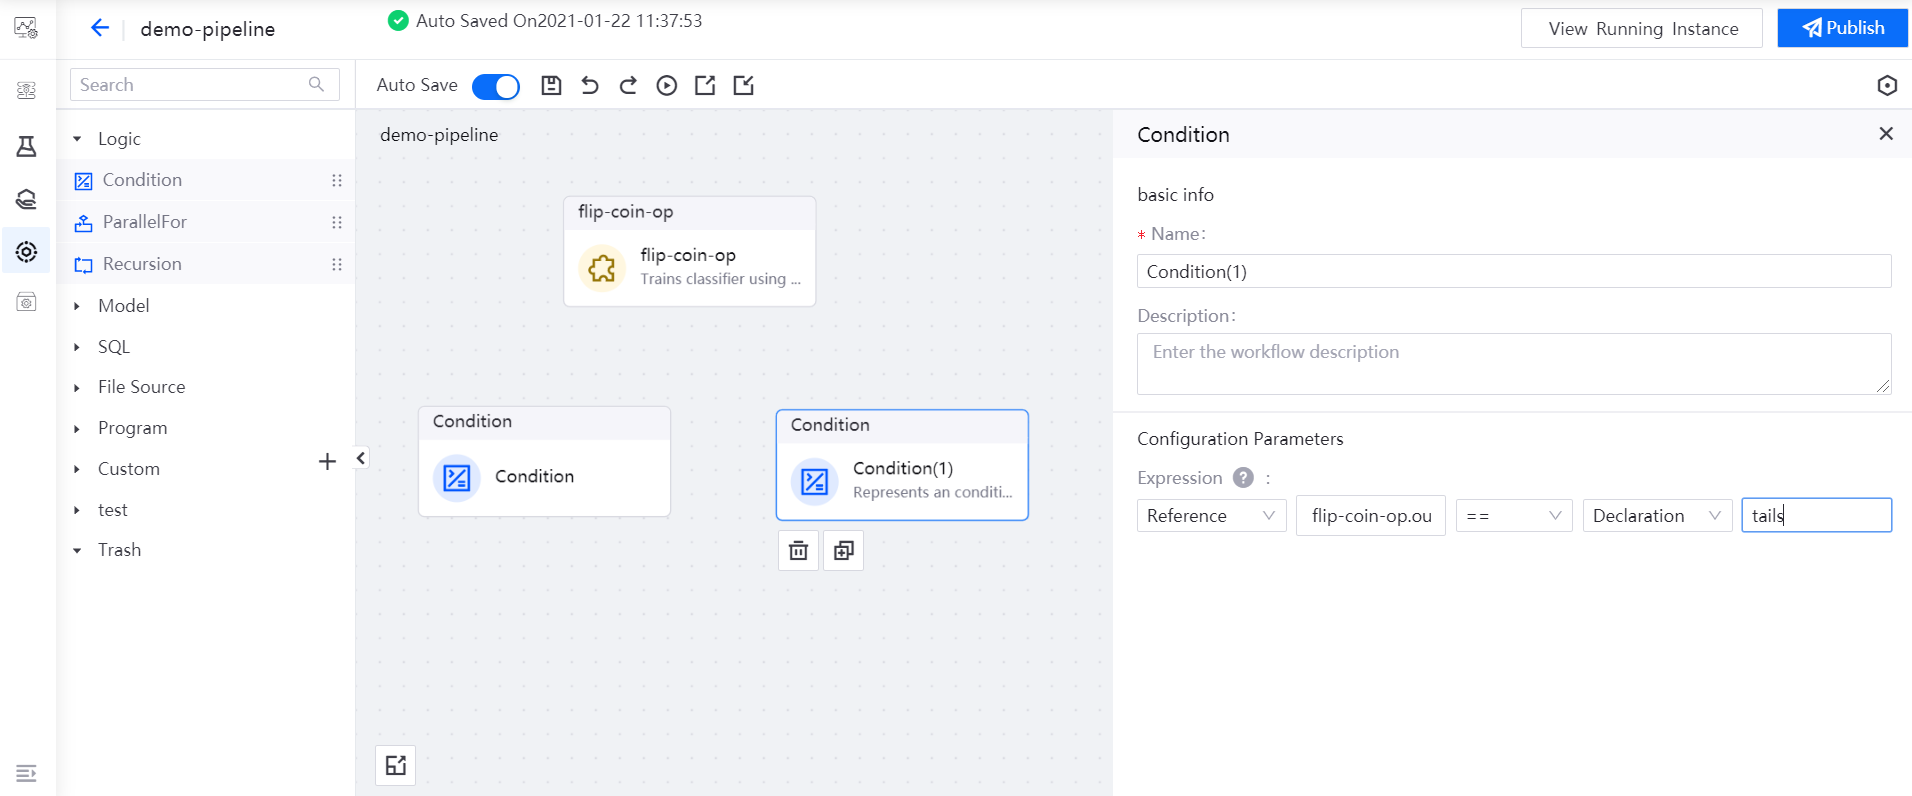
Double-click the Condition operator to open its sub-canvas, drag the print-op operator to the editing canvas, and reference the
outputvalue of the flip-coin-op operator for printing the value offlip-coin-op.output.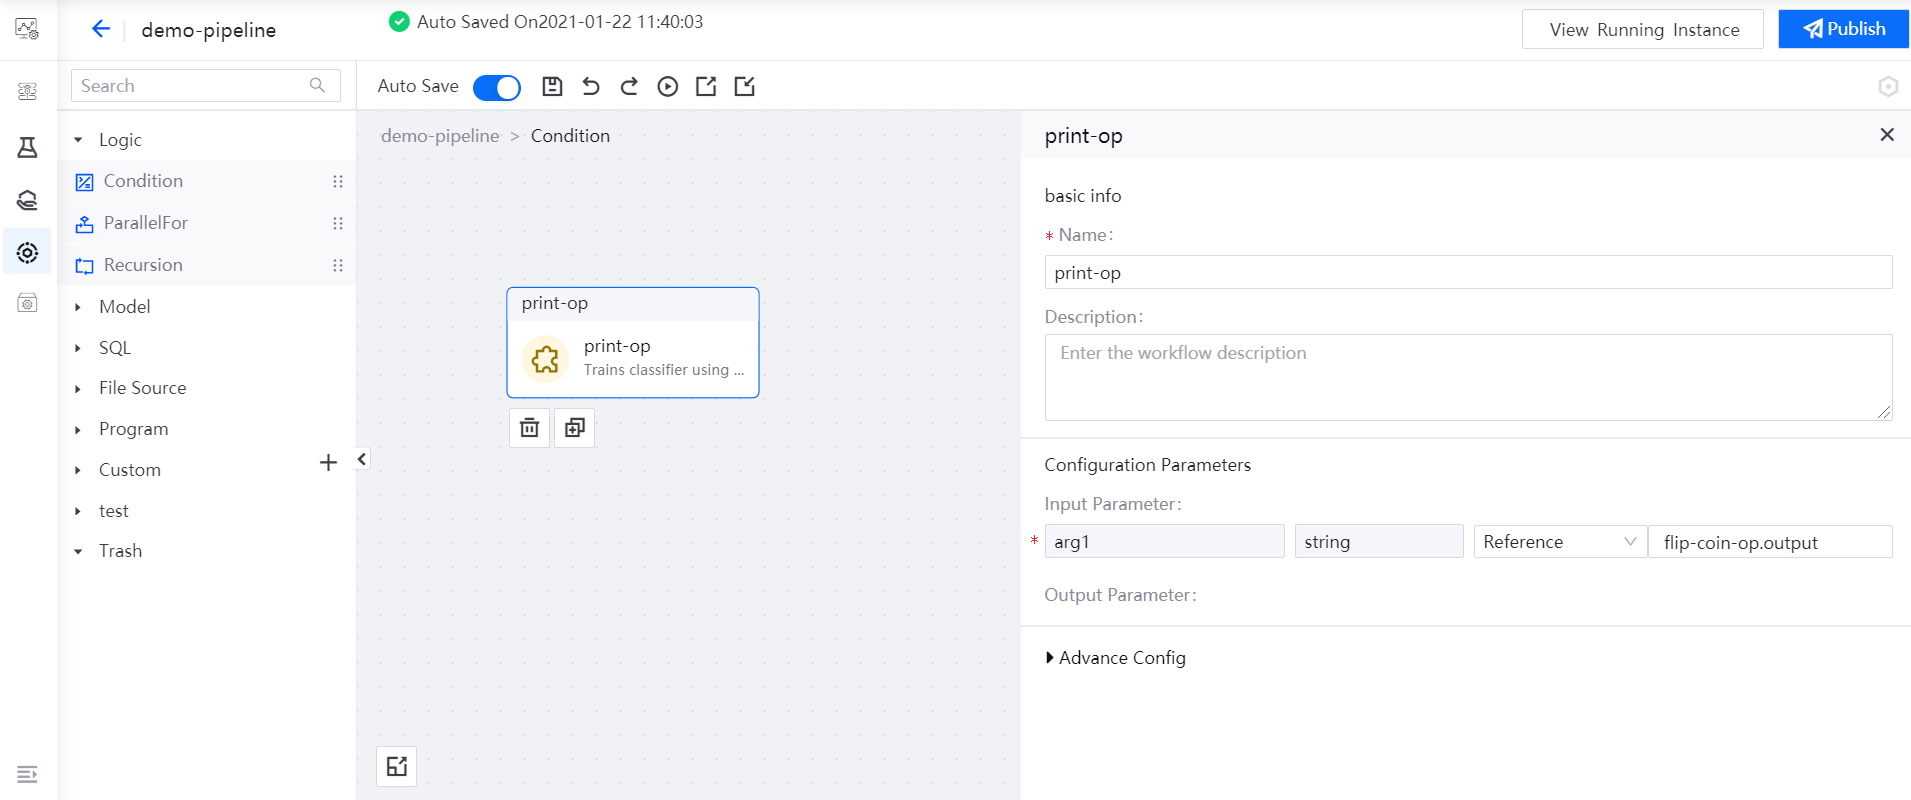
By referring to Step 4, double-click the Condition(1) operator, and configure the print-op operator in its sub-canvas.
In the main canvas, drag the output point of the flip-coin-op operator and connect it to the input points of the two Condition operators with arrows to indicate the logical dependence among the operators so as to complete the orchestration of the pipeline.
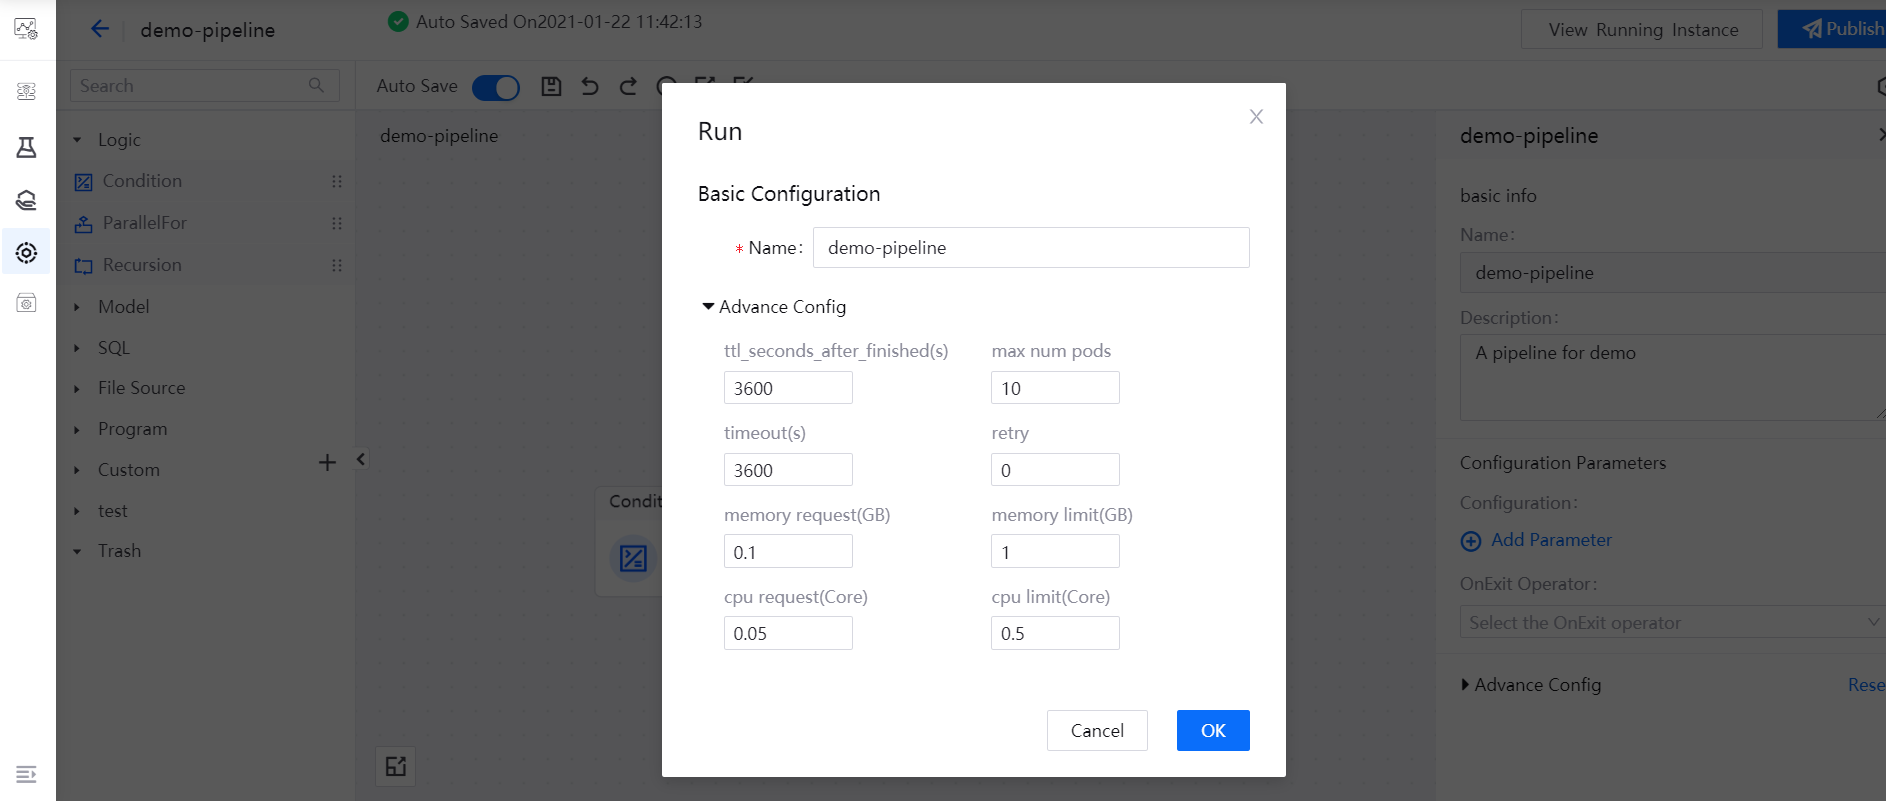
Running Pipelines
After saving the pipeline, click the Run icon in the functional operation area. In the pop-up window, click OK after completing the resource configuration for running the pipeline.
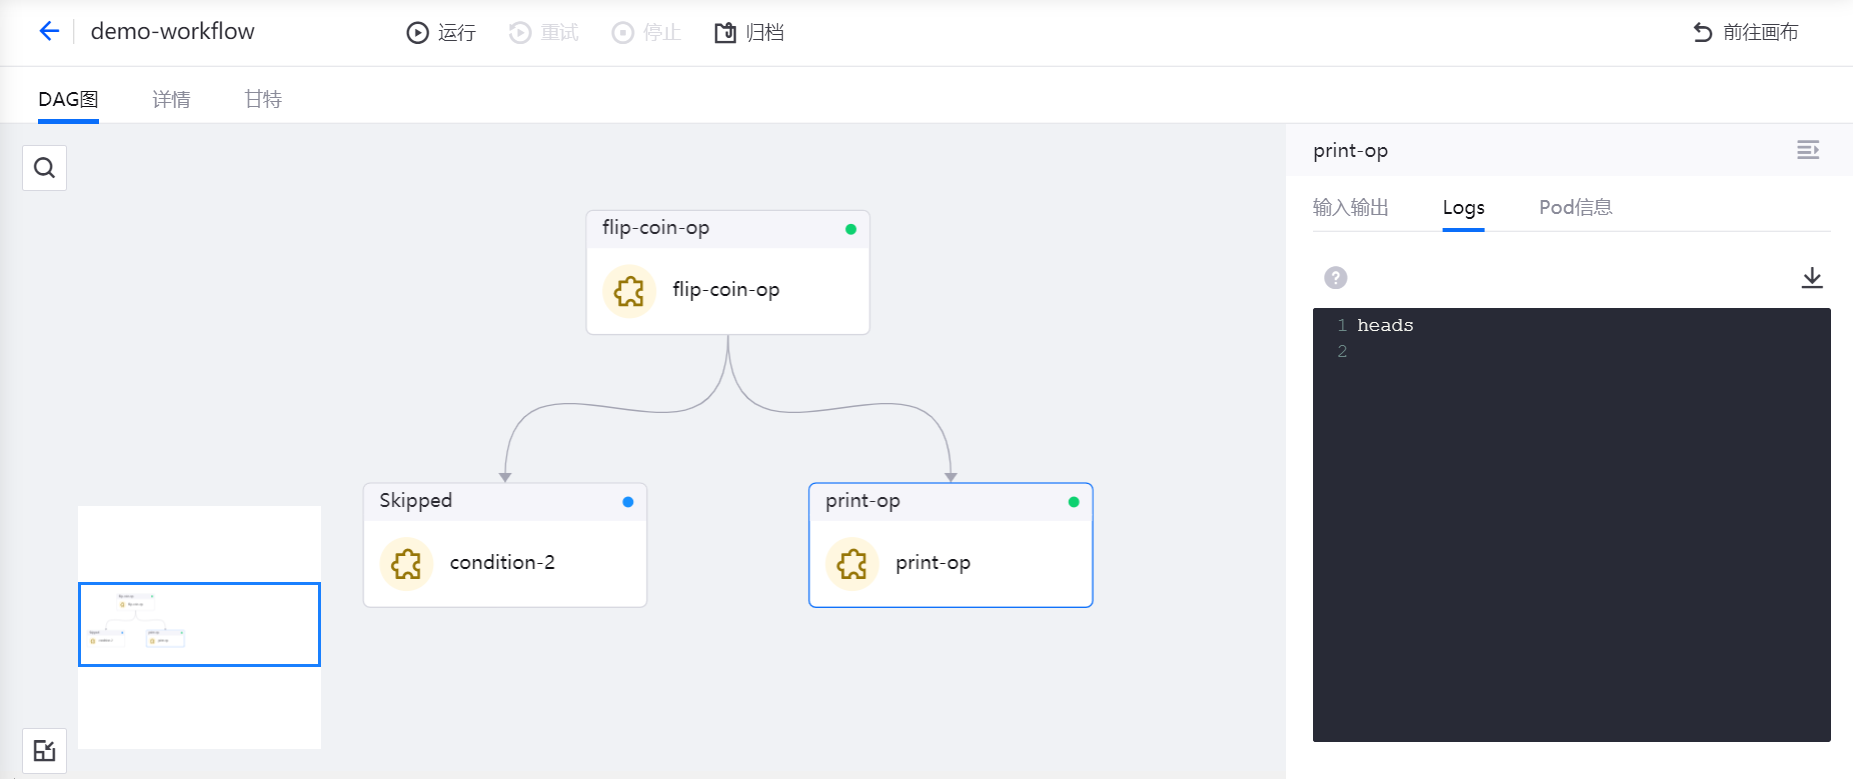
After the pipeline starts running, click the View Running Instance icon in the functional operation area, and you can view the pipeline instance that has run in the Running Instances list.

Click the instance name to view the running results of the pipeline instance.