Building Process Models
Process models form the basis of BPM. With the suite of process elements provided by BPM, you can easily design and build process models that are suitable for your organization.
This section describes how to build process models.
Procedure
Create Process Models
In the navigation pane, select Process Models.
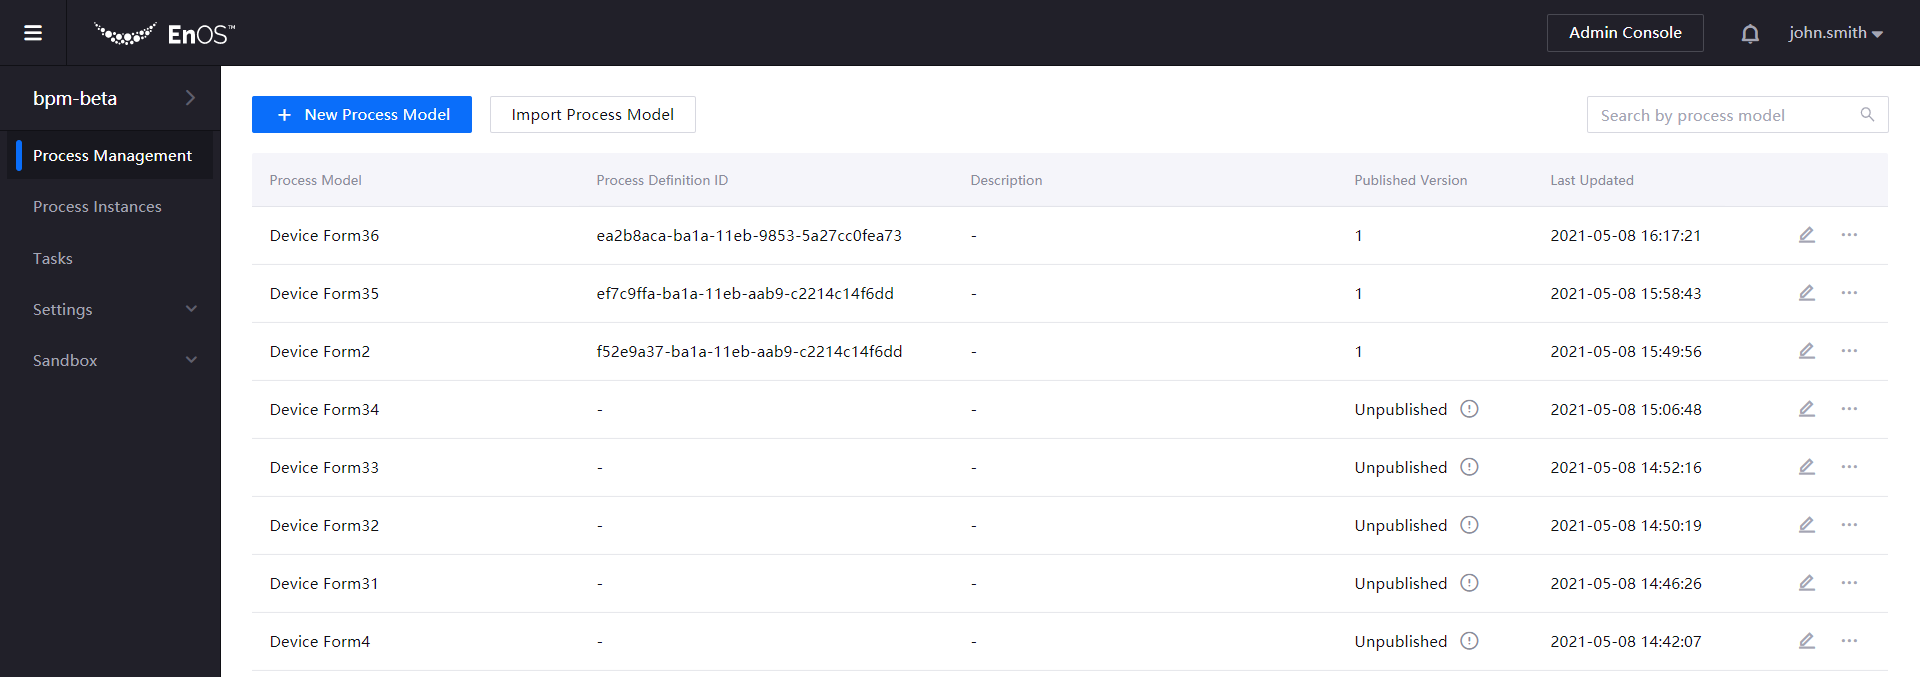
Click New Process Model.
The New Process Model dialog box appears.In the Model Name box, enter a unique name for the model.
In the Start Permission section, define who can start processes based on this process model.
Note
Process starters are granted view permissions automatically.
In the View Permission section, define who can view the corresponding processes.
If you want to use custom statuses for your process model, perform these steps:
Turn on Apply Custom Statuses.
From the Status Group drop-down list, select the status group that you want to use.
From the Initial Status drop-down list, select the first status to display after a process is started.
If you want to enable process termination for users, perform these steps:
Turn on Enable Process Termination.
In the Termination Permission section, define who can terminate the corresponding processes.
Click Save.
A new row appears in the list of process models.Note
You can delete a process model by hovering over the ellipsis (…) and clicking Delete.

Edit Process Model Properties
In the navigation pane, select Process Models.
Next to the process model that you want to configure, click Edit.
The process designer appears with the process model properties on the right pane.Note
If you are configuring process elements on the canvas, click an empty part of the canvas to display the process model properties.
Modify the properties as necessary.
Click Save.
Design the Process Flow
In the navigation pane, select Process Models.
Next to the process model that you want to configure, click Edit.
The process designer appears. By default, the None Start Event is already included on the canvas. If necessary, click the None Start Event to rename the event or add a form to the event.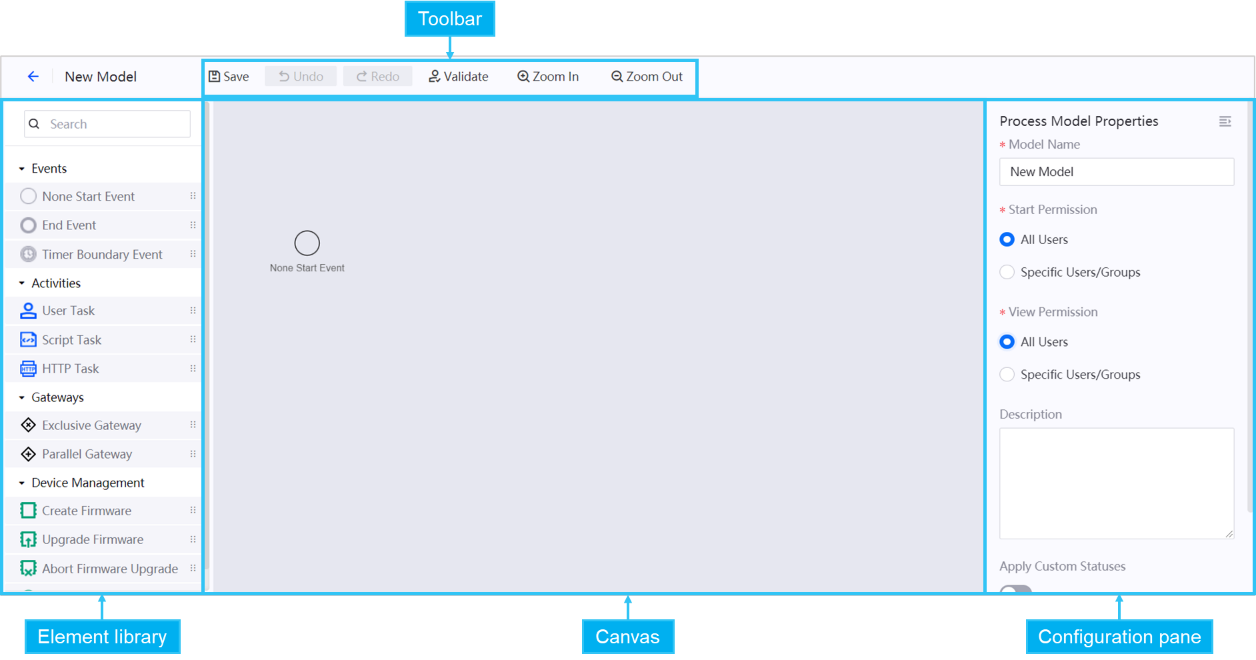
From the left pane, drag elements that you want to use to the canvas.
Select elements on the canvas and configure their details in the right pane.
For more information about process elements, see Process Elements.Link elements by dragging a connector from the output point of an element to the input point of another element.
Note
You can only drag the connector from an output point, you cannot drag it from an input point.
If necessary, perform any of the following actions when designing a process flow:
Undo or redo your last action by clicking the toolbar buttons.
Zoom in or out of the canvas by using the scroll wheel or clicking the toolbar buttons.
Copy any element by pressing the Ctrl + C keys on your keyboard.
Delete any element by pressing the Delete key on your keyboard.
After you have finished designing the process flow, click Validate to check for errors.
Note
All process models must end with at least one End Event.
Click Save.

Design Forms
For elements such as None Start Event or User Task, you can add a form used for capturing user inputs.
Select the element on the canvas and click Design Form in the right pane.
The form designer appears.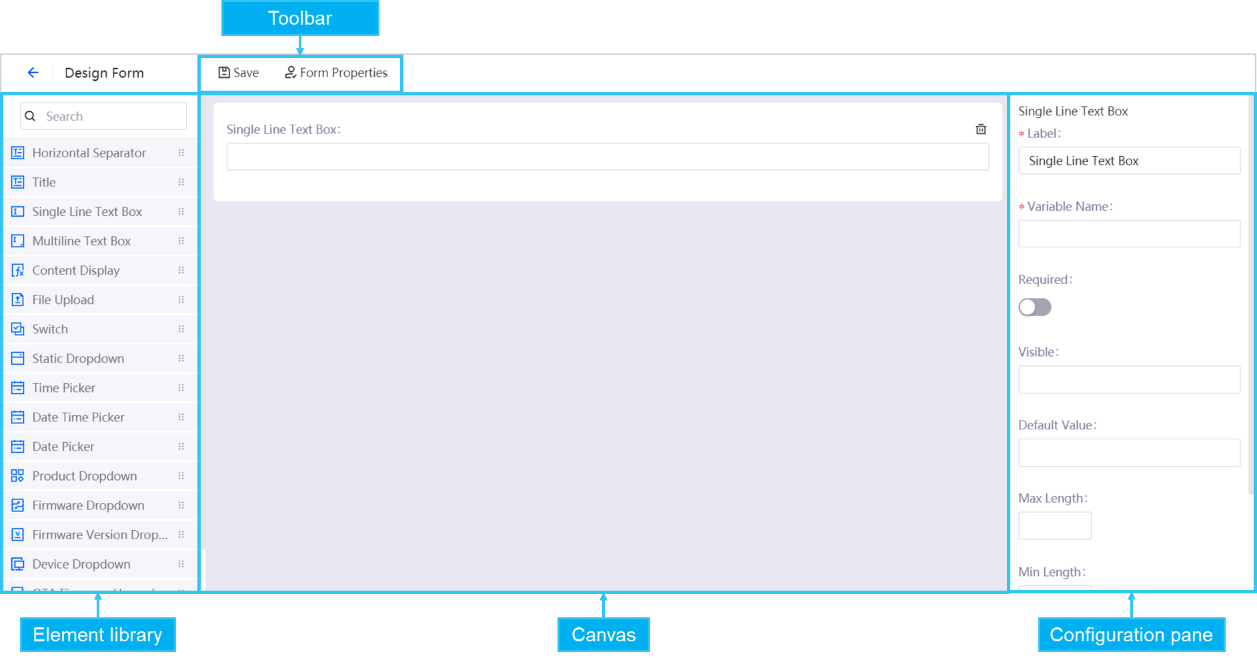
From the left pane, drag form elements to the canvas, and arrange them based on your preference.
Select elements on the canvas and configure their details in the right pane.
For more information about form elements, see Form Elements.Click Form Properties.
The Form Properties dialog box appears.In the Form Name box, enter a form name for your own reference.
In the Form Key box, enter an OU-wide unique key used to identify the form. The form key cannot be reused in other process models in the same OU.
In the Form Actions section, add the buttons that will appear on the form by performing these steps:
In the Key box, enter a unique key that is used to identify the button.
In the Name box, enter the name that will appear on the button.
Click Add Actions to add more buttons.
Note
You must define the action for a button by referencing its key in a connector condition. For more information about connectors, see Connectors.
Click Save.

Configure Notification Settings
You can configure process models to notify the respective users about the runtime status of processes or tasks through emails. This enables users who are out of office or not monitoring the BPM app to take actions with a short response time.
In the navigation pane, select Process Models.
Next to the process model that you want to configure, hover over the ellipsis (…) and click Notify.
Turn on notification for the events that you want to notify users about.
The users notified depend on the event type.Click Save.
Note
The notification function is based on the EnOS Notification Management service, and the default notification quota is 0. To enable notifications to be sent for BPM, you must request for an increase in mail quota for the BPM application from EnOS Management Console. For more information about requesting for an increase in mail quota, see Quota Management.
Results
You can now test and publish the process model.